October 13, 2026
I recently replaced a set of steps on the patio in my backyard. The original steps were stone, either limestone or sandstone, and had started to crack and crumble in various places.
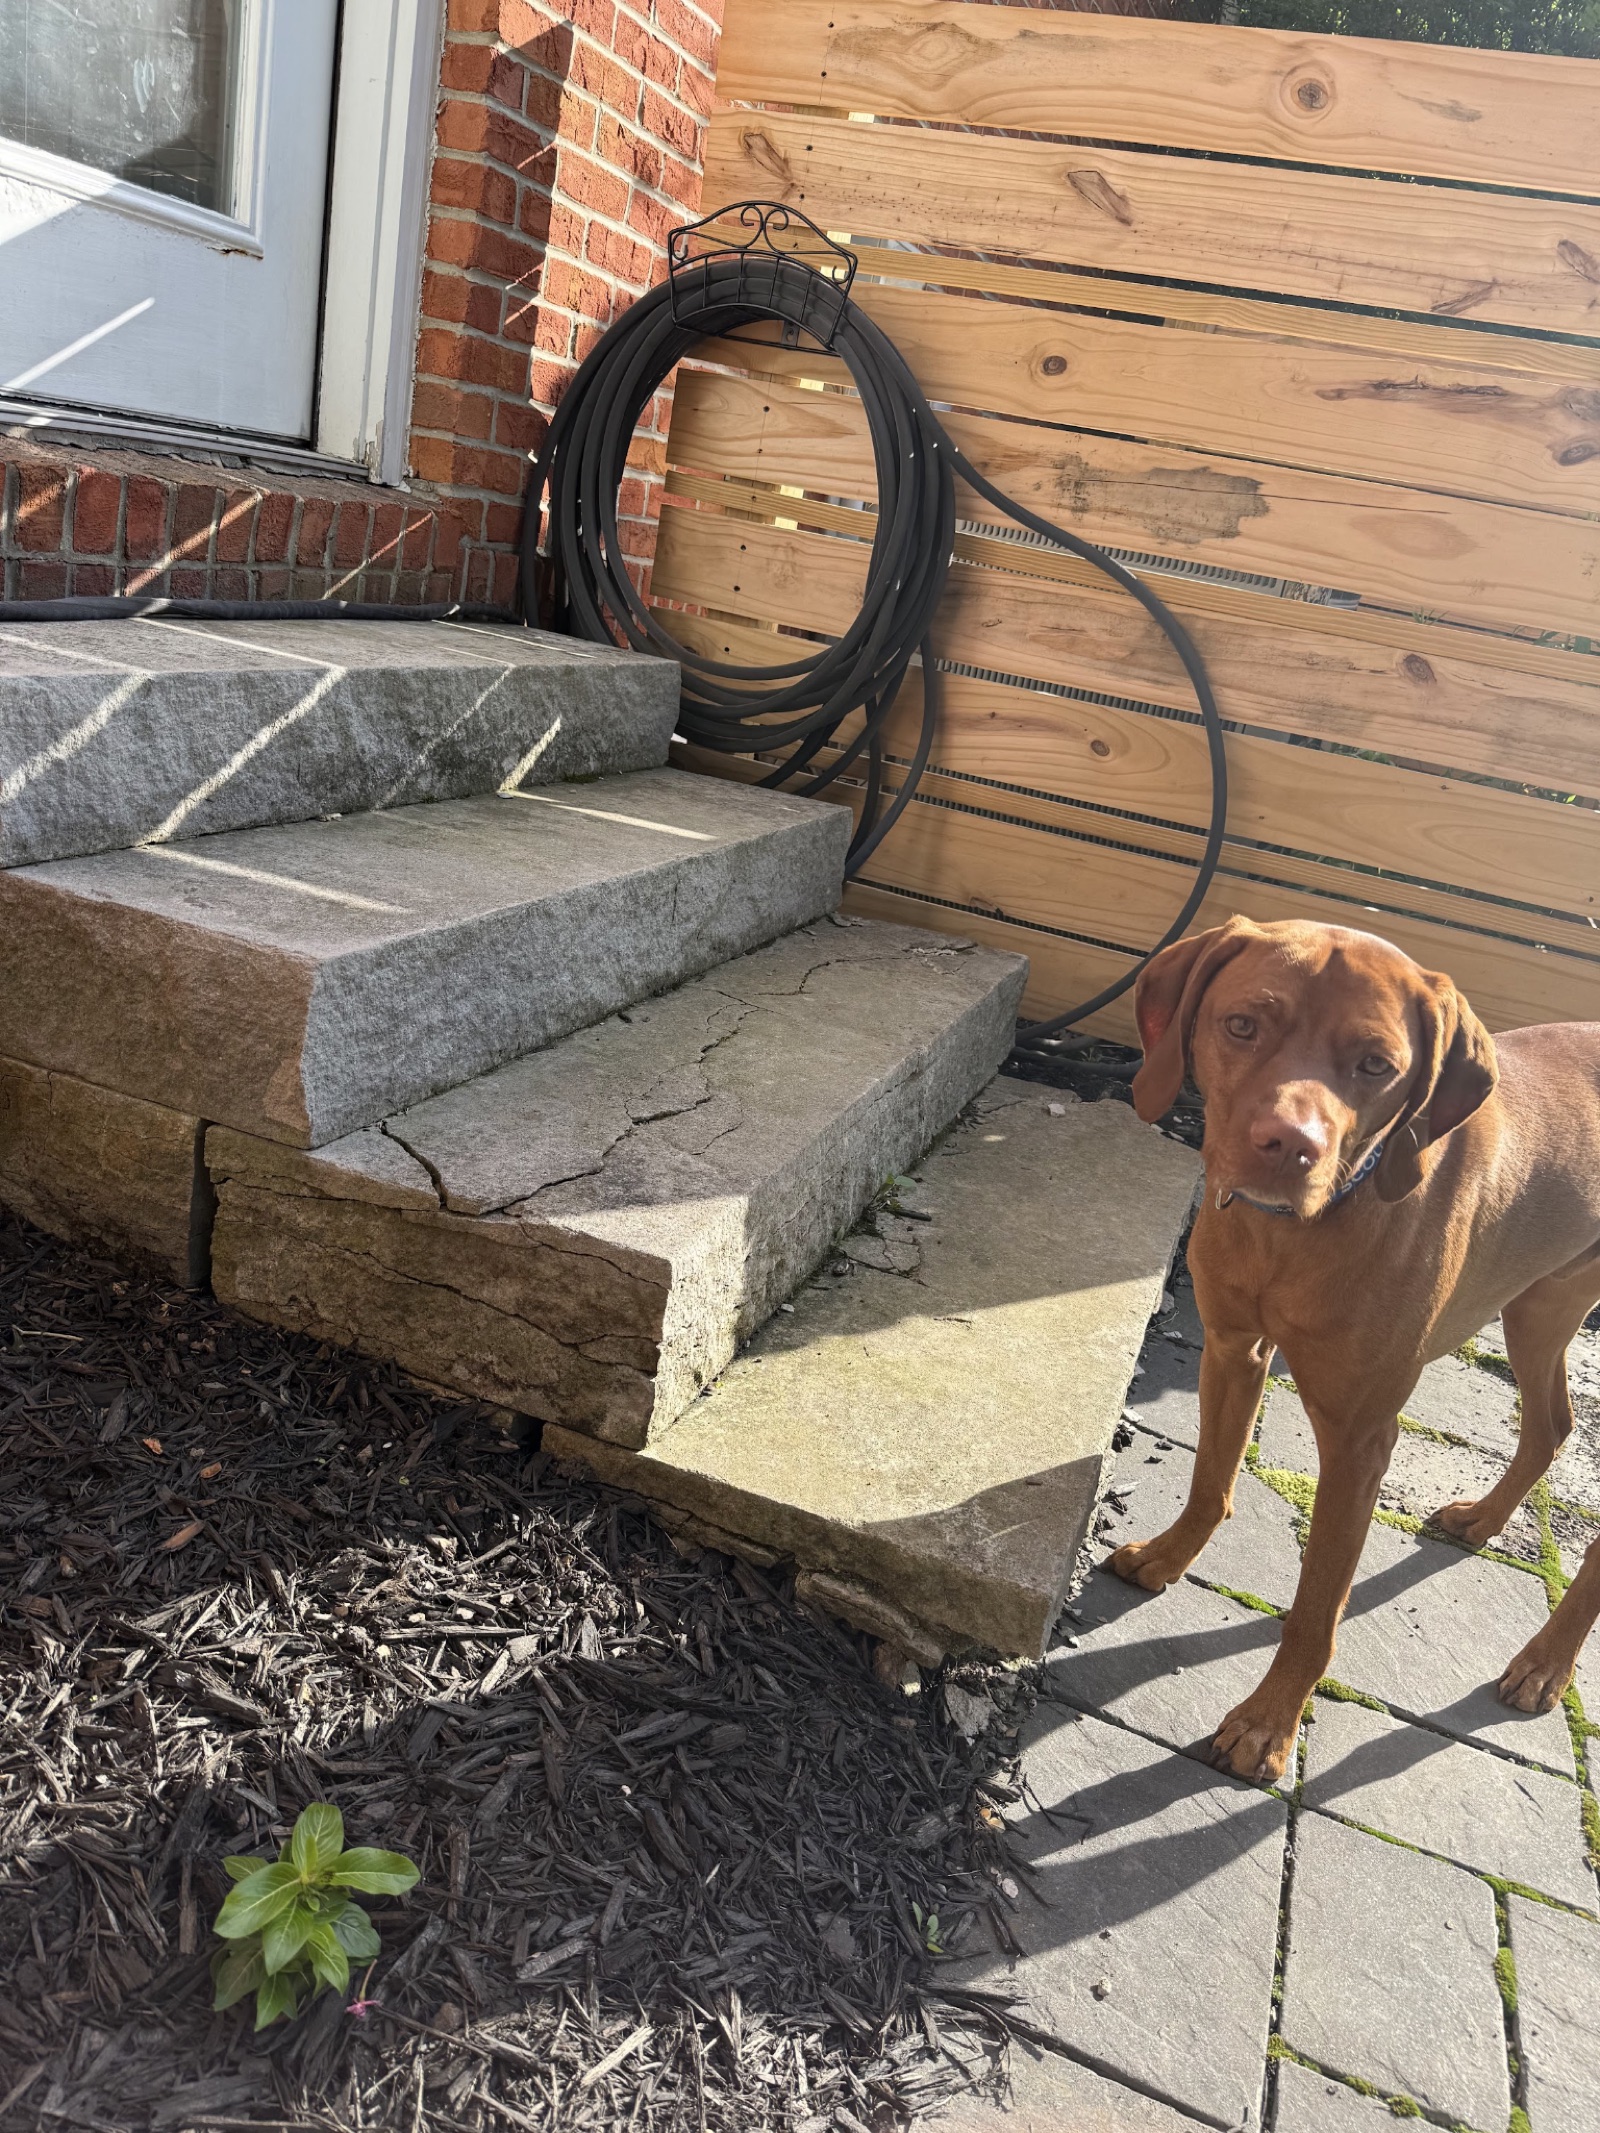
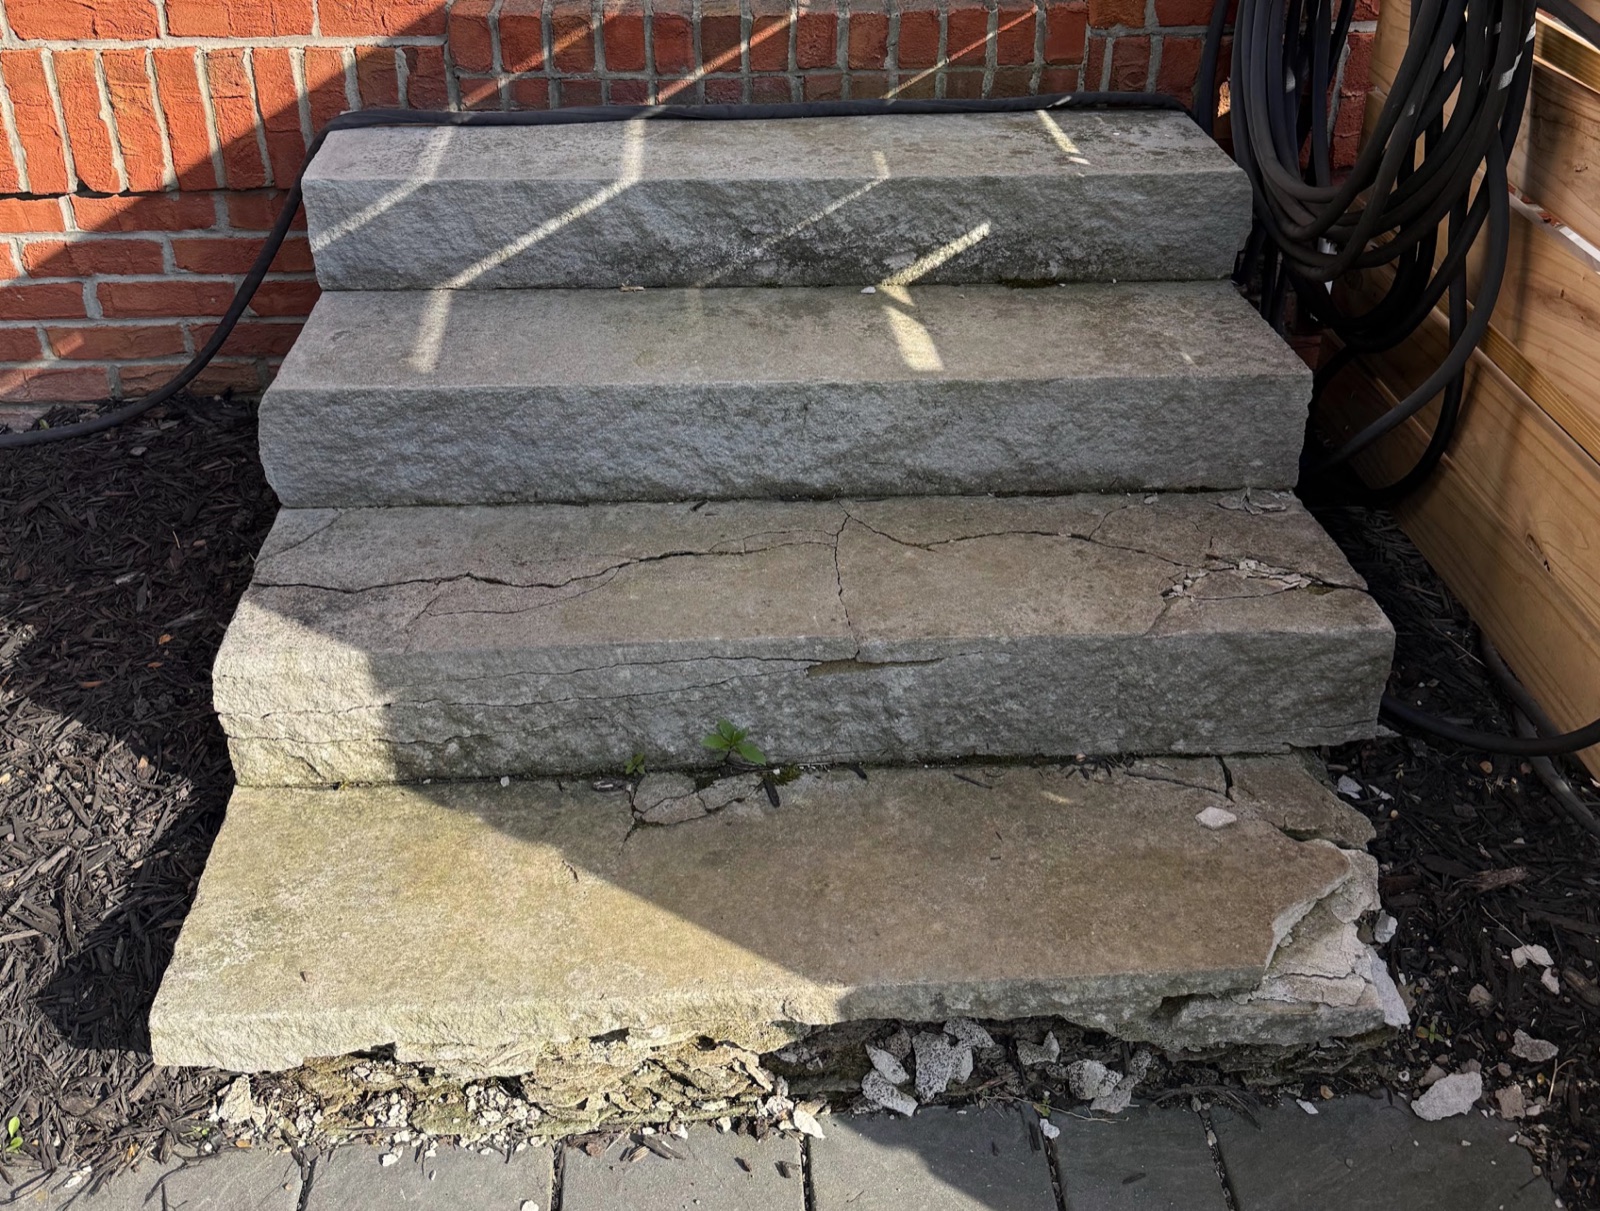
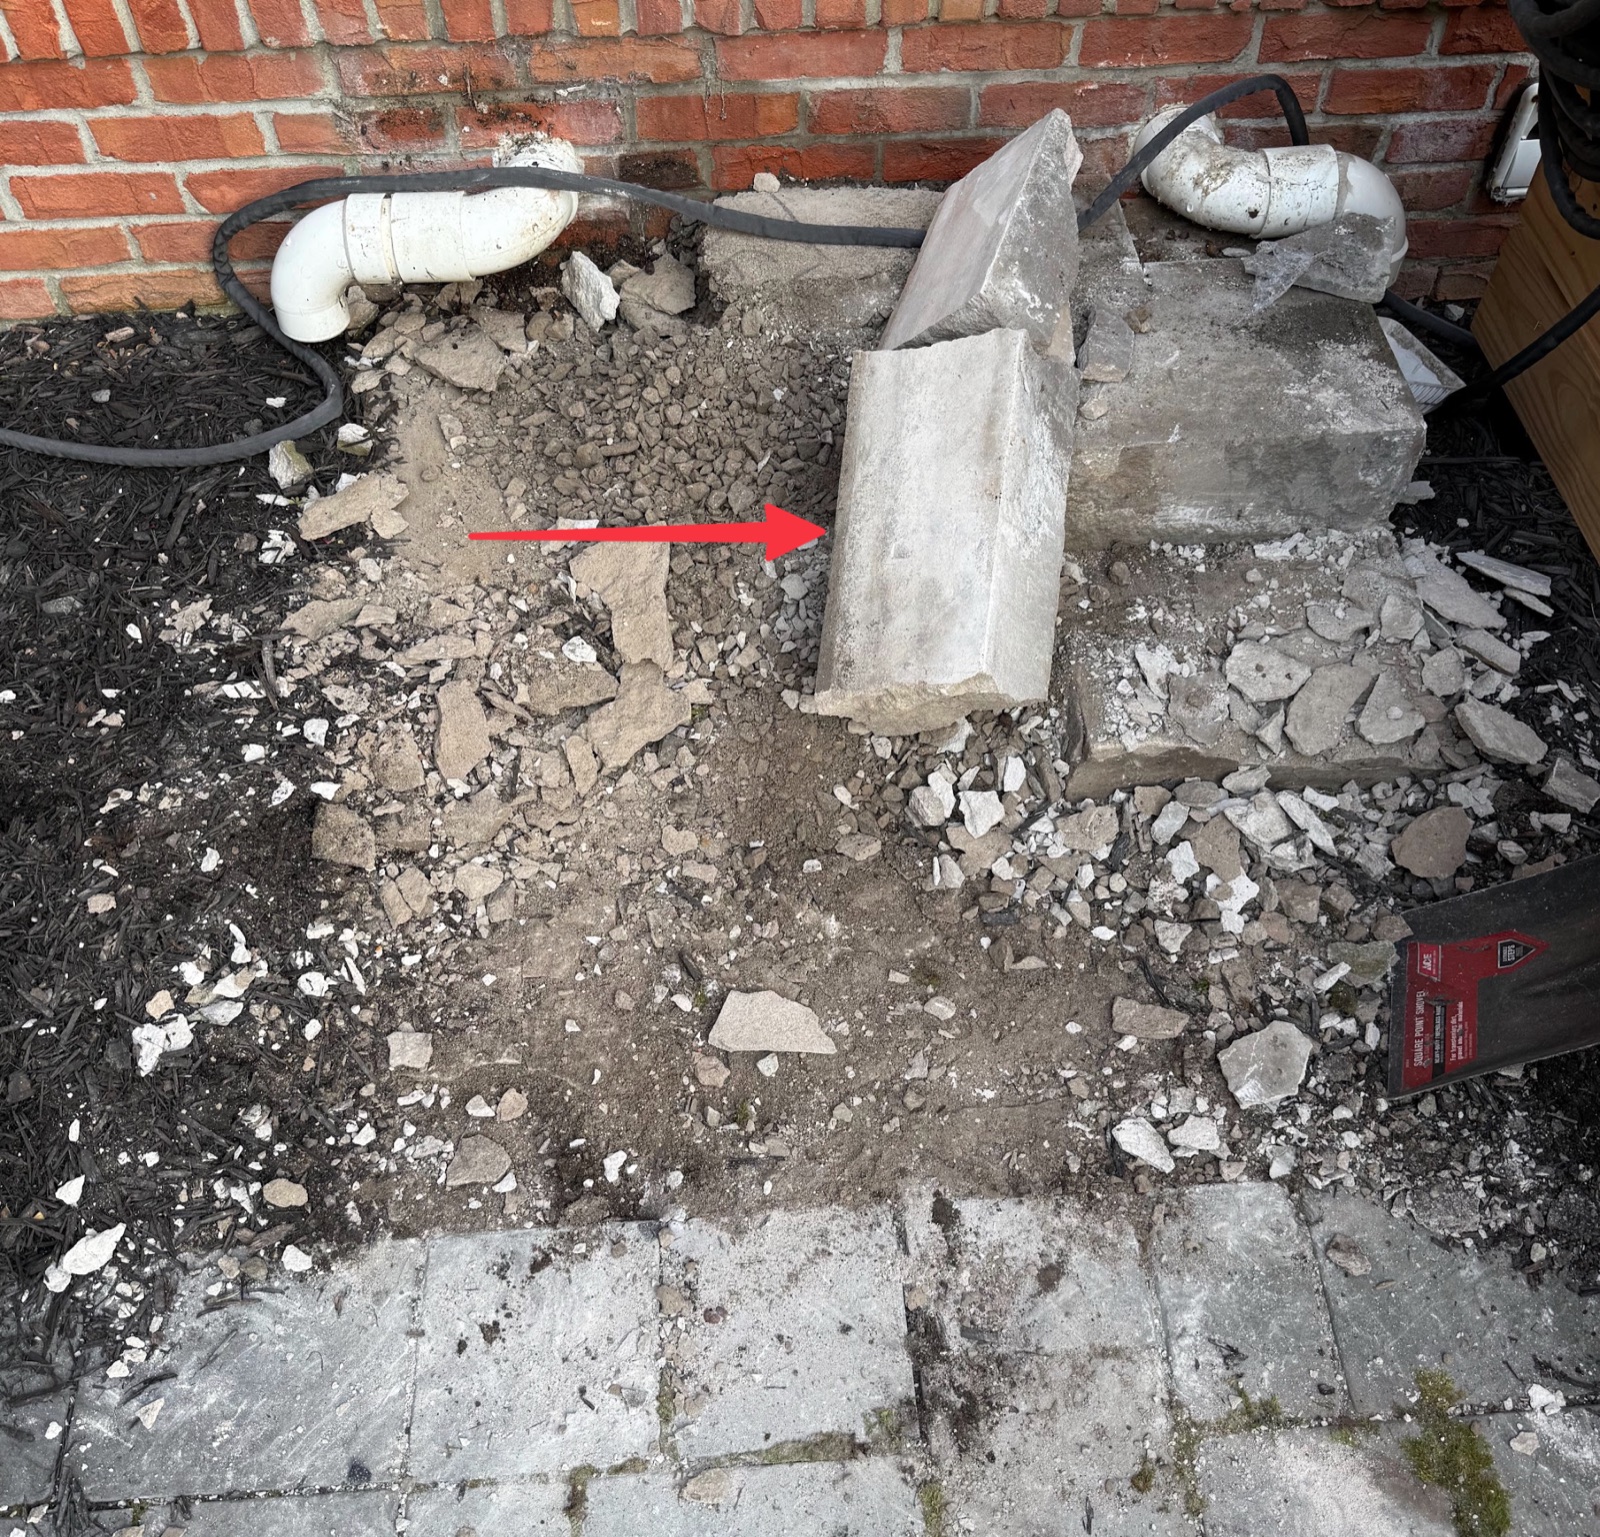
I started by removing the old steps, which was a massive job in itself. My best estimate was that each step weighed somewhere 400 and 500 pounds. Starting at the top, I used a big crowbar to pull each step away from the house. This part was easy since there wasn’t any adhesive, or if there was it had worn off since my house was built 30 years ago. I pulled each step away from the house, and I positioned them on a downward angle on the remaining part of the staircase. Then I took a big sludge hammer and cracked them into chunks so that I could load them into my wheelbarrow and move them onto my driveway. The chunks were still massively heavy, with many of the pieces being at basically the max amount that I could lift in a shape that awkward.
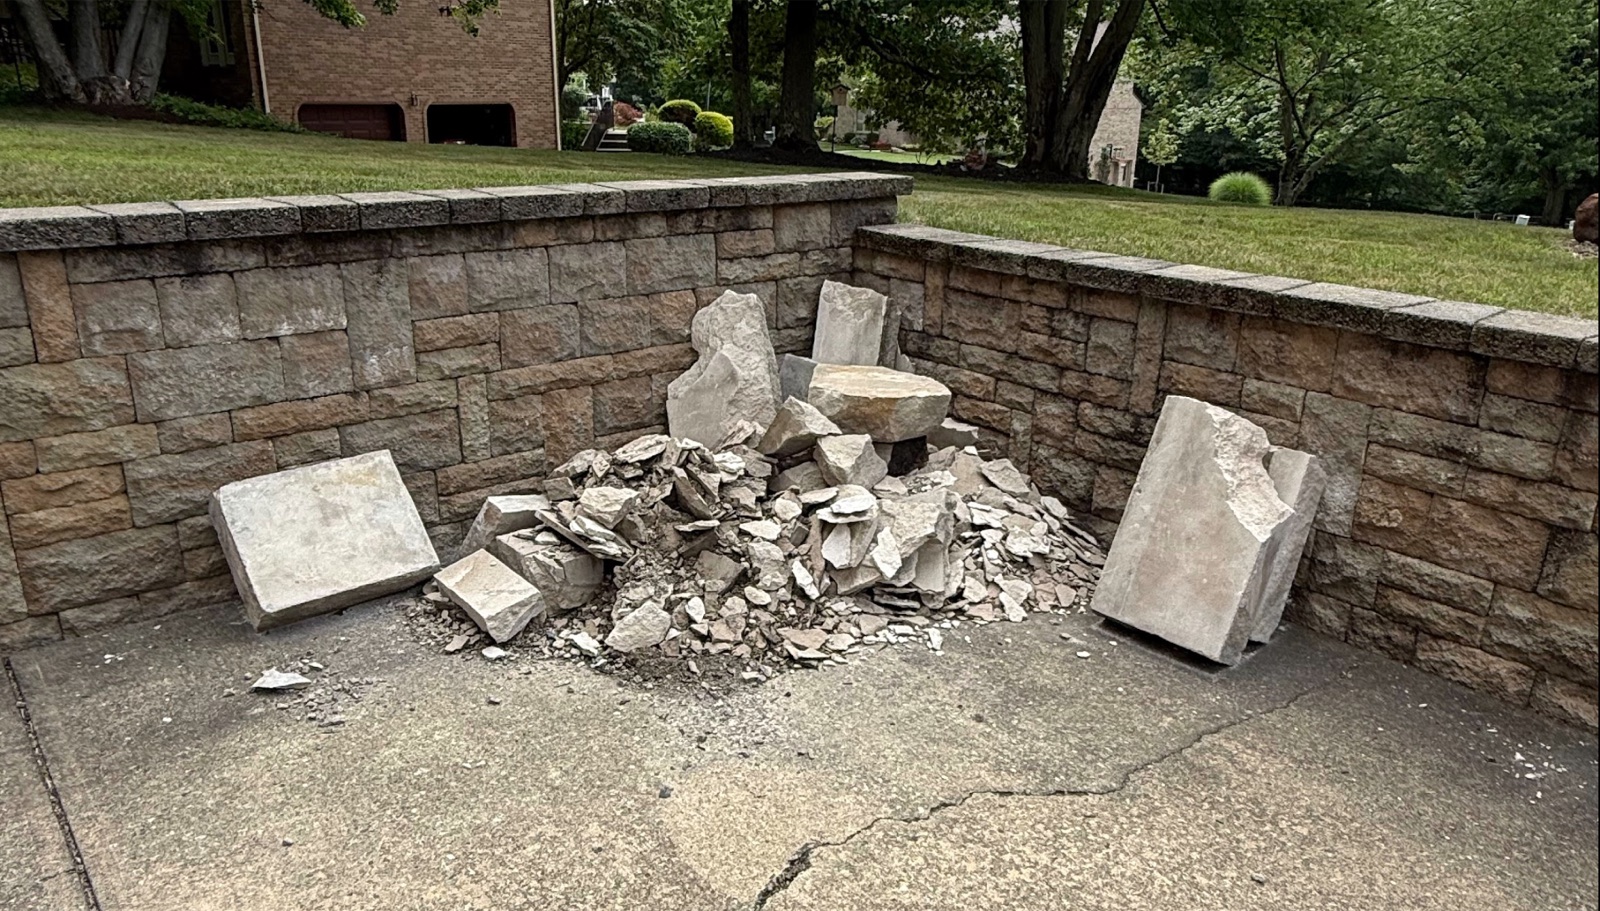 All of the steps after I broke them and moved to my driveway.
I had a junk removal company come and pick it all up for $180. There were seven full steps that I removed with each weighing an estimated 450 pounds for a total of roughly 3,150 pounds. $180 felt like an absolute steal of a deal.
Originally, I was going to replace the stone steps with the same material but I got multiple quotes for $3-5k all in which felt like a terrible value considering how little we use these steps. My plan then changed to build a concrete form out of 2x10s and ¾ inch plywood and pour them myself. I picked up some materials and started to make cuts and began assembly of the form. When I was building the form, I ran into one tricky issue with a set of exhaust pipes from my furnace that exited the house right behind where the steps were built.
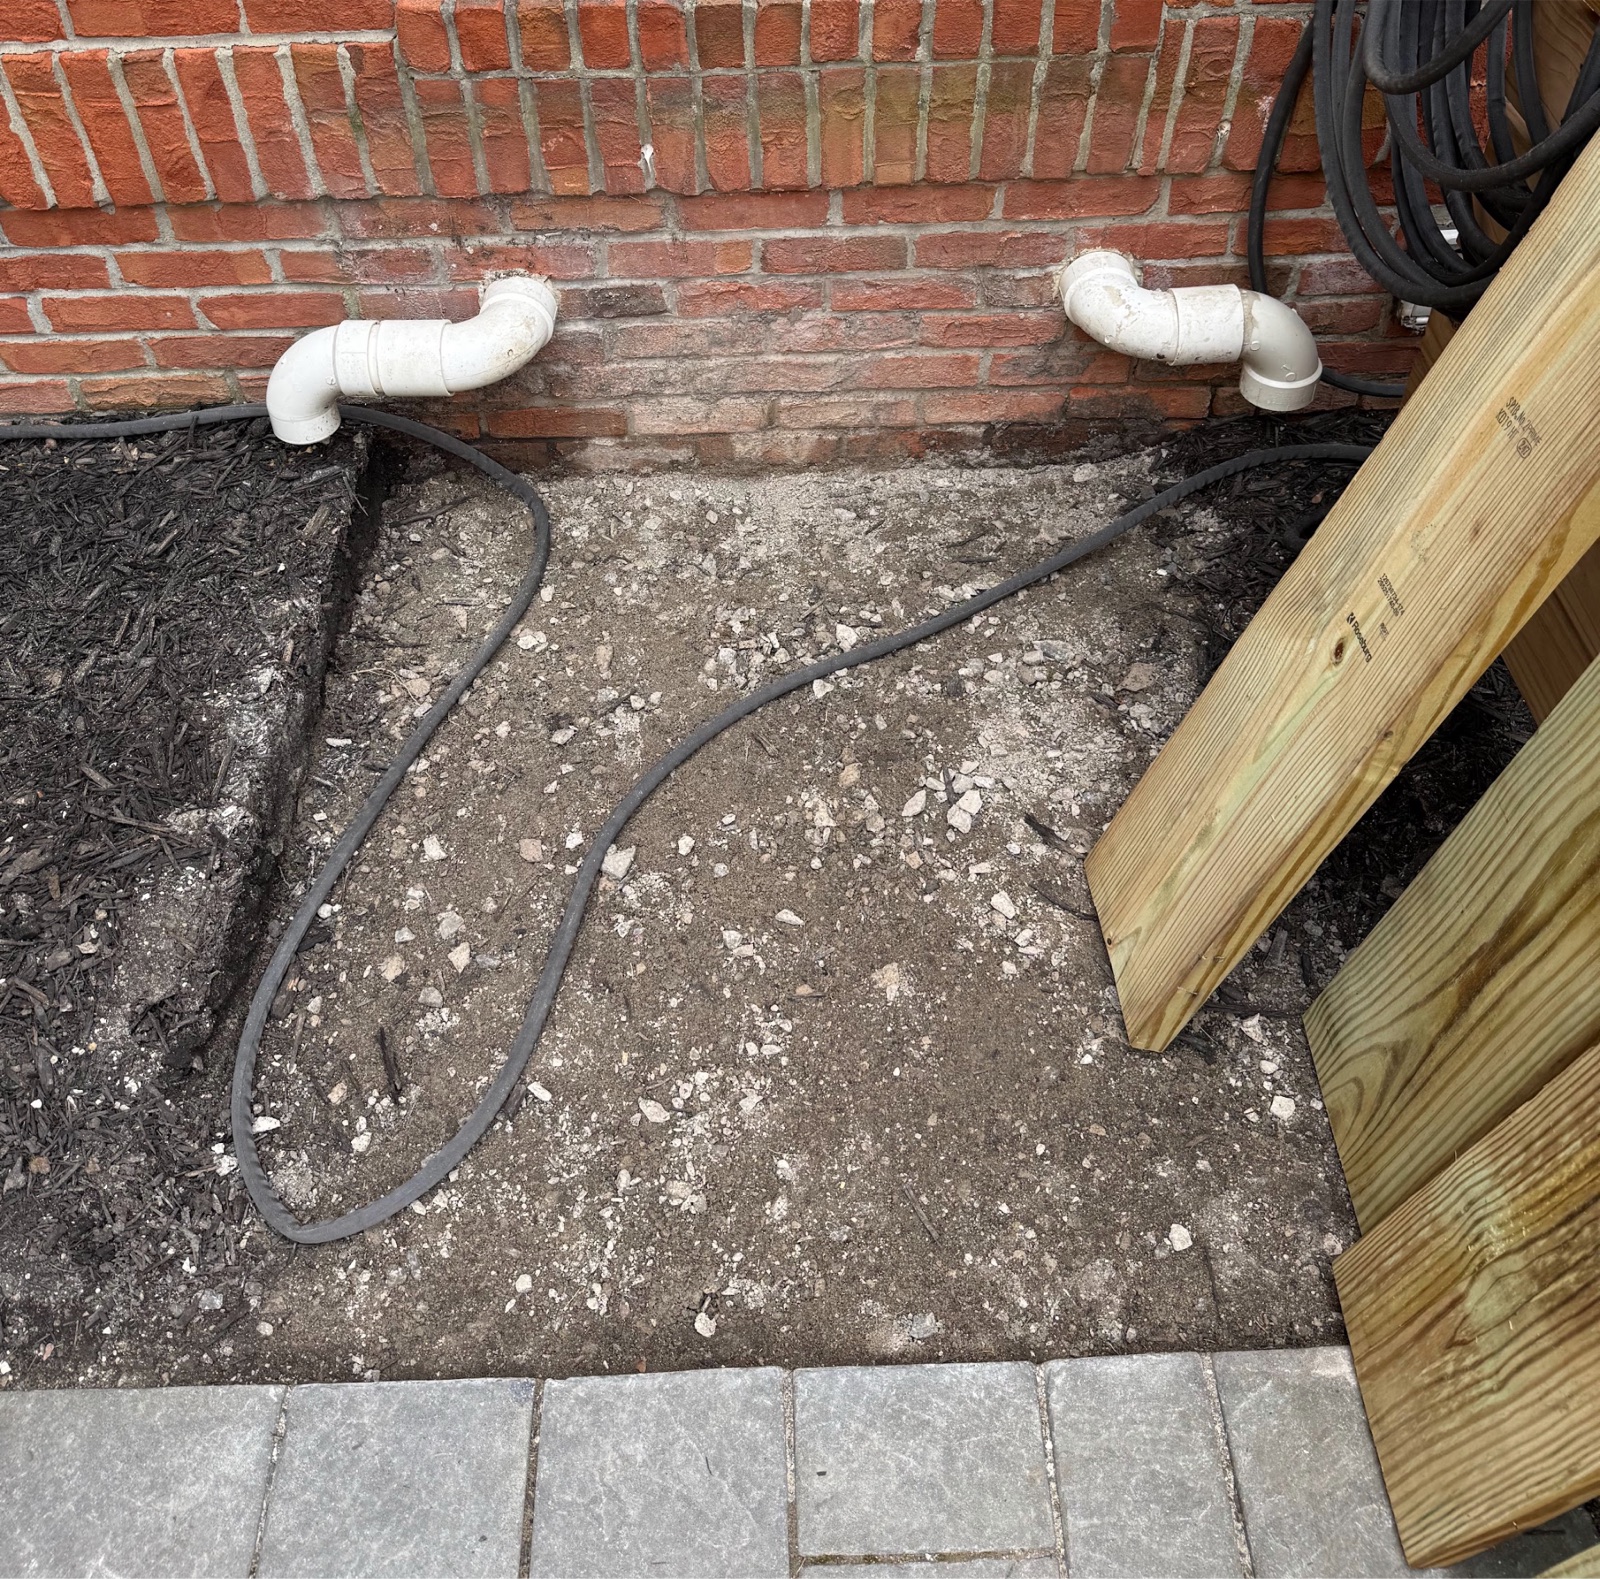
Why the builder put the exhaust pipes right underneath a door where they knew a staircase was needed is beyond me. It would have taken 10 minutes of thought to have the pipes exit the house another 12 inches wider on each side. The way I planned on handling this was building the form around these pipes. I didn’t want to cover the pipes with concrete and make them totally inaccessible in case I ever needed to access them, which would require destroying the staircase. I decided to build two square boxes in the form around each pipe that would prevent them from being covered in concrete. Moving the pipes was technically an option but that would be way more work than it was worth. Here’s what the form looked like.
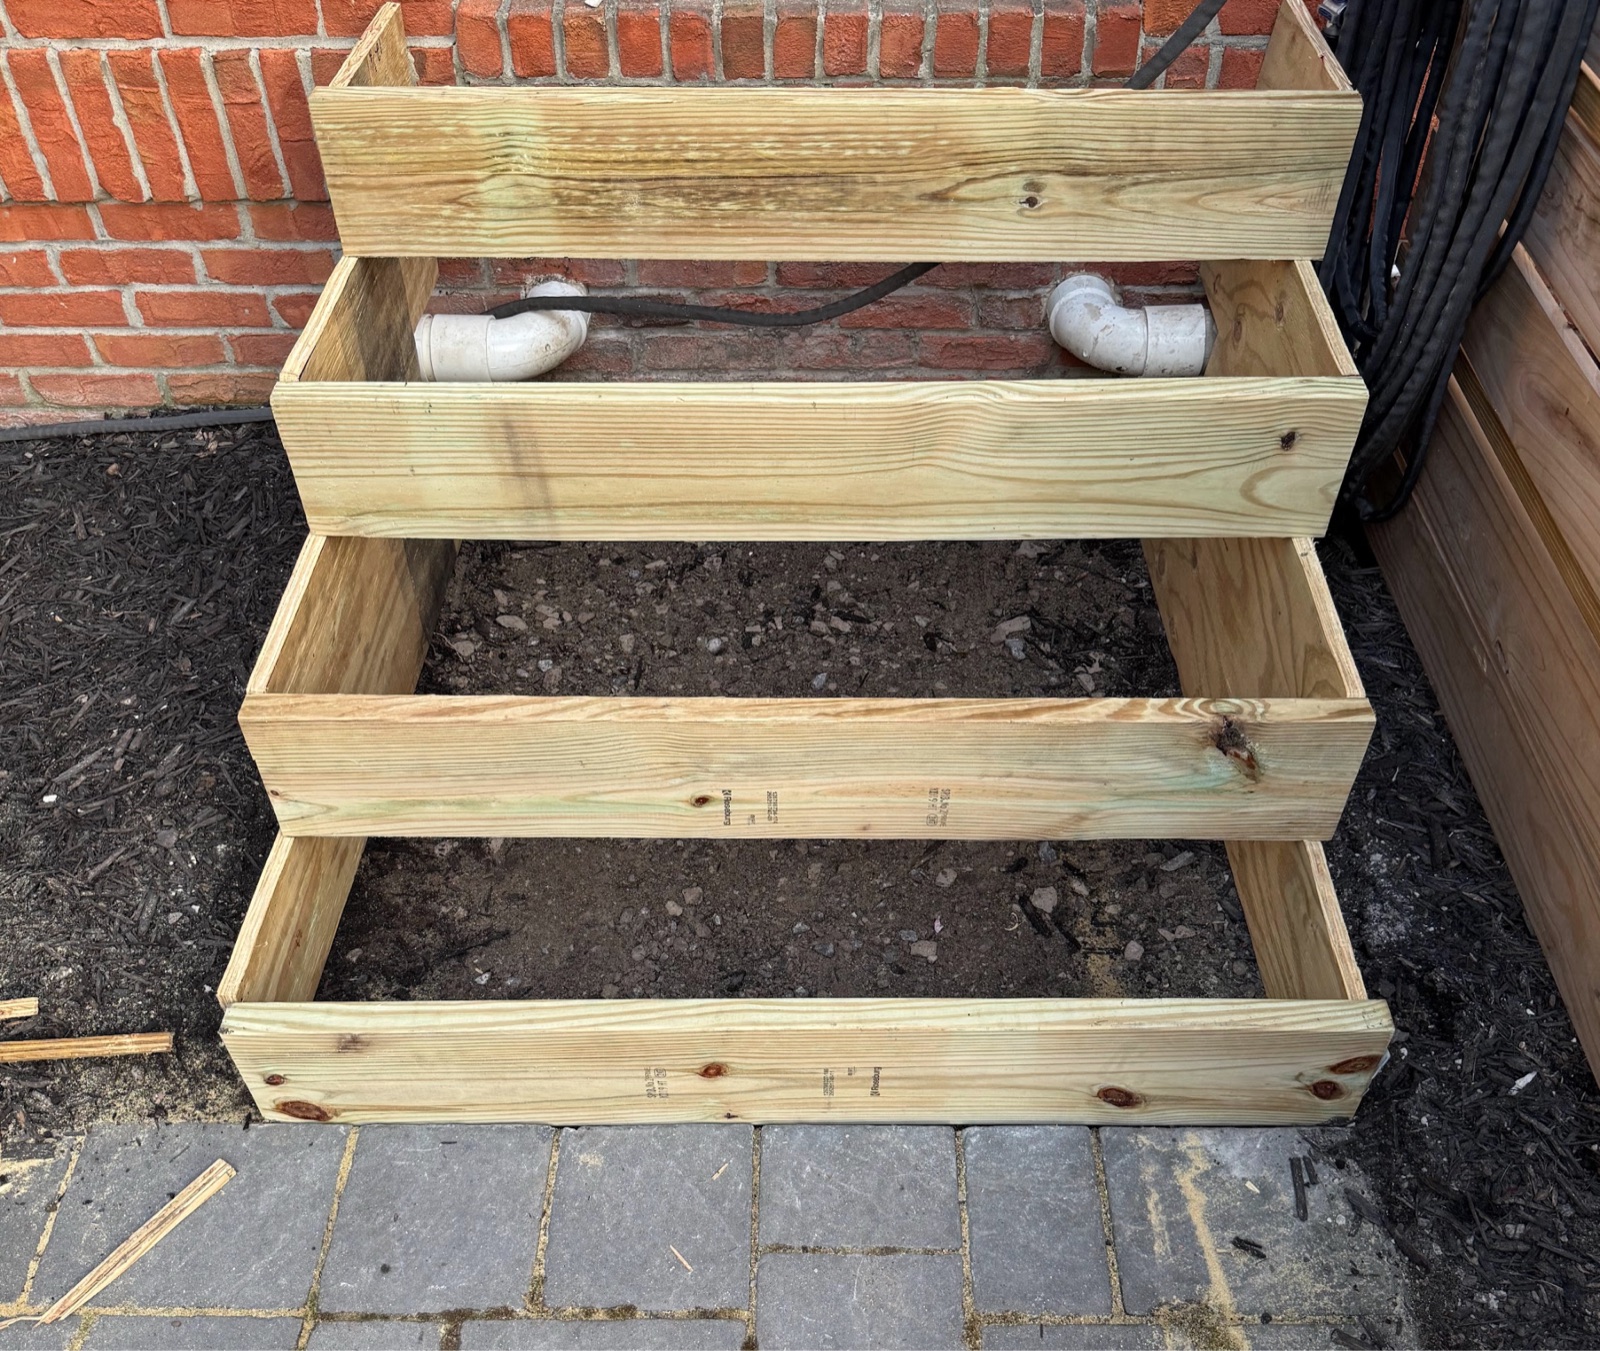 This photo doesn’t show the wood enclosures I built around each pipe, which I forgot to take a picture of. I had AI add the missing enclosures around the pipes to illustrate it.
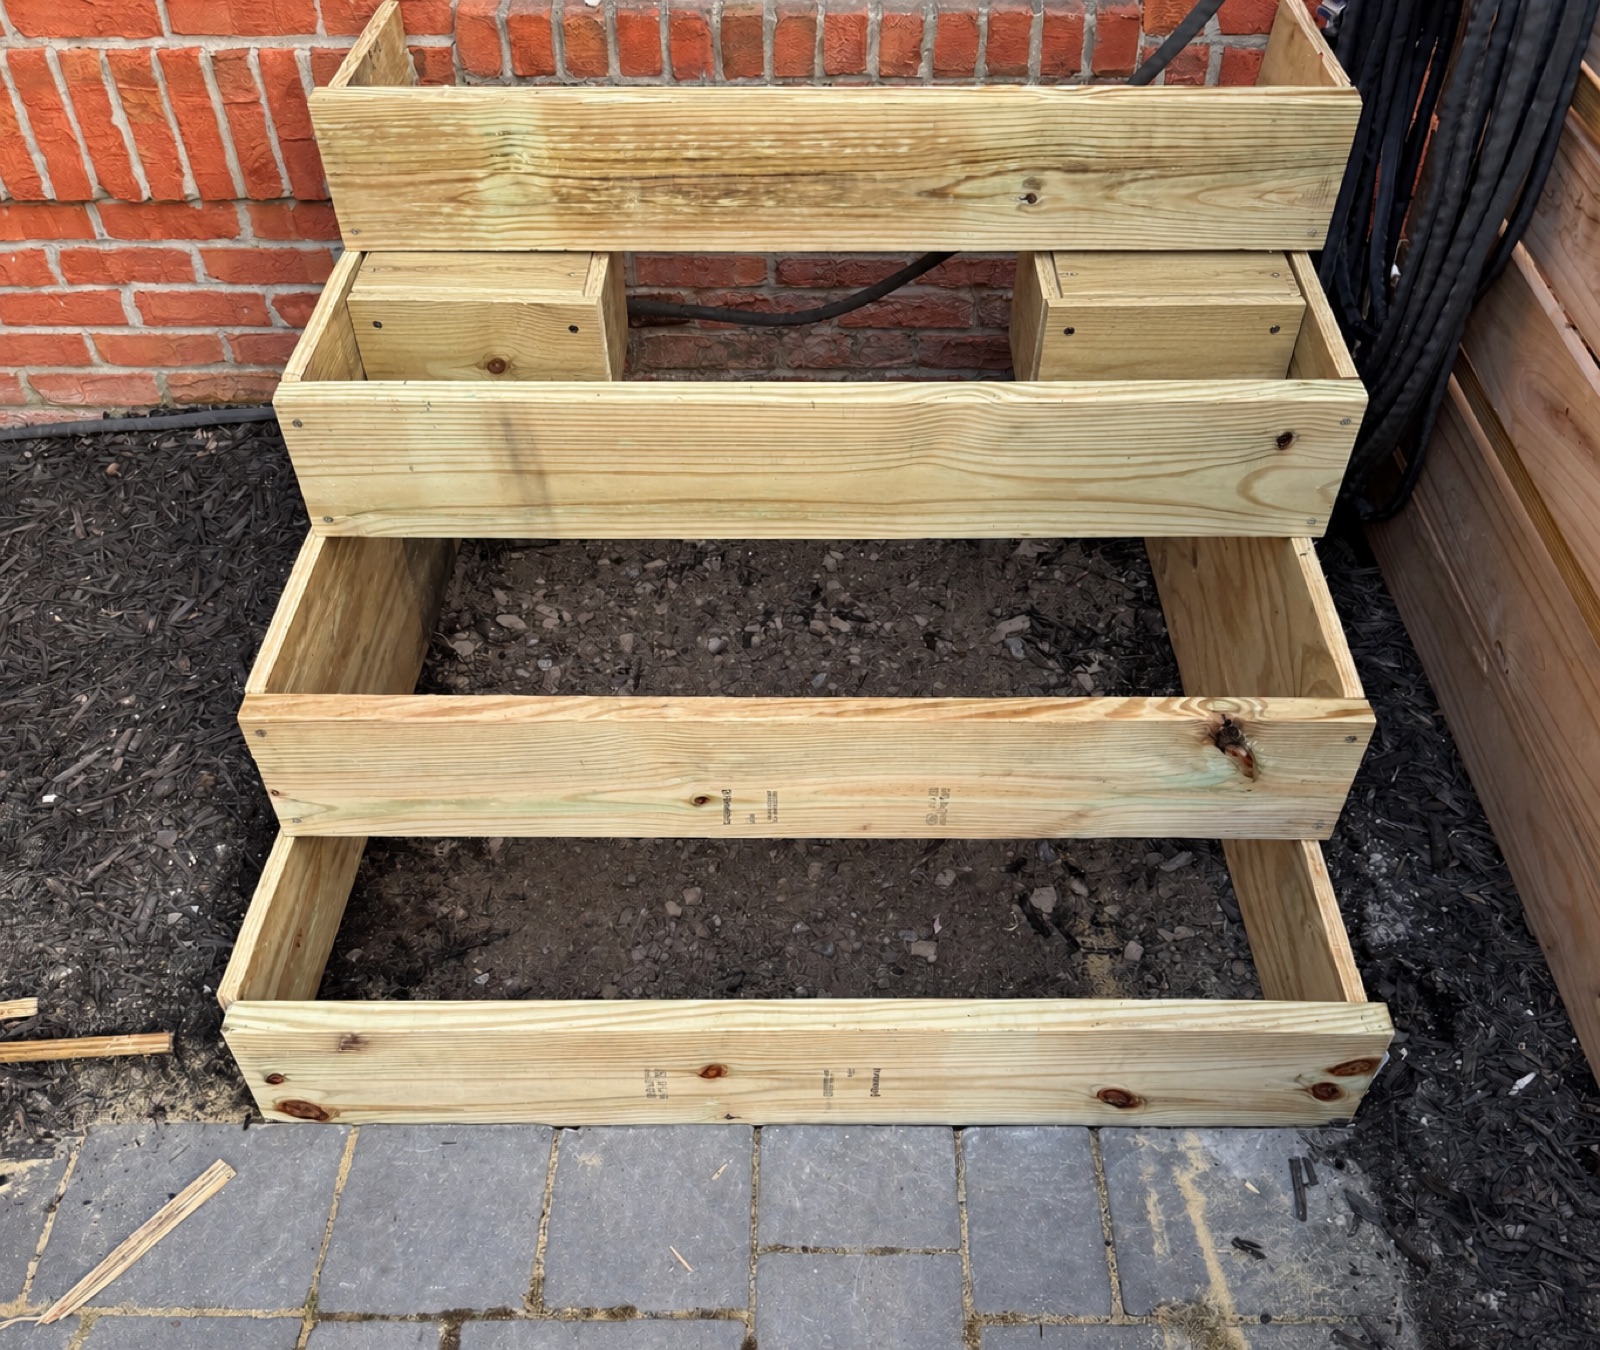
After looking at the form in place I realized there was a problem. Once the concrete was poured, there’d be no way to remove the wooden enclosures from the pipes. They’d be completely submerged by concrete. I wanted to pour the step all at once instead of doing step by step, although it did seem possible to remove the wooden boxes around the pipes if I were to pour one step at a time and then stack them. So I thought more about it, and decided that concrete wasn’t the best option, and I would instead build a detached staircase using composite decking. Since the previous staircase was made of individual stone steps, the builder had the luxury of cutting them to fit around the pipes. So I went back to the store, bought some 2x8s and started assembling the frame.
There are two ways to build steps. The first way is to attach a ledger board to the thing the steps are anchored to and then add step stringers at a roughly 45 degree angle down towards the ground. The second way is to build rectangular platforms, stack them on top of each other, and fasten them together with screws. With the stringer approach, you attach your runners (the board your foot lands on as you walk up/down the steps) to the stringers.
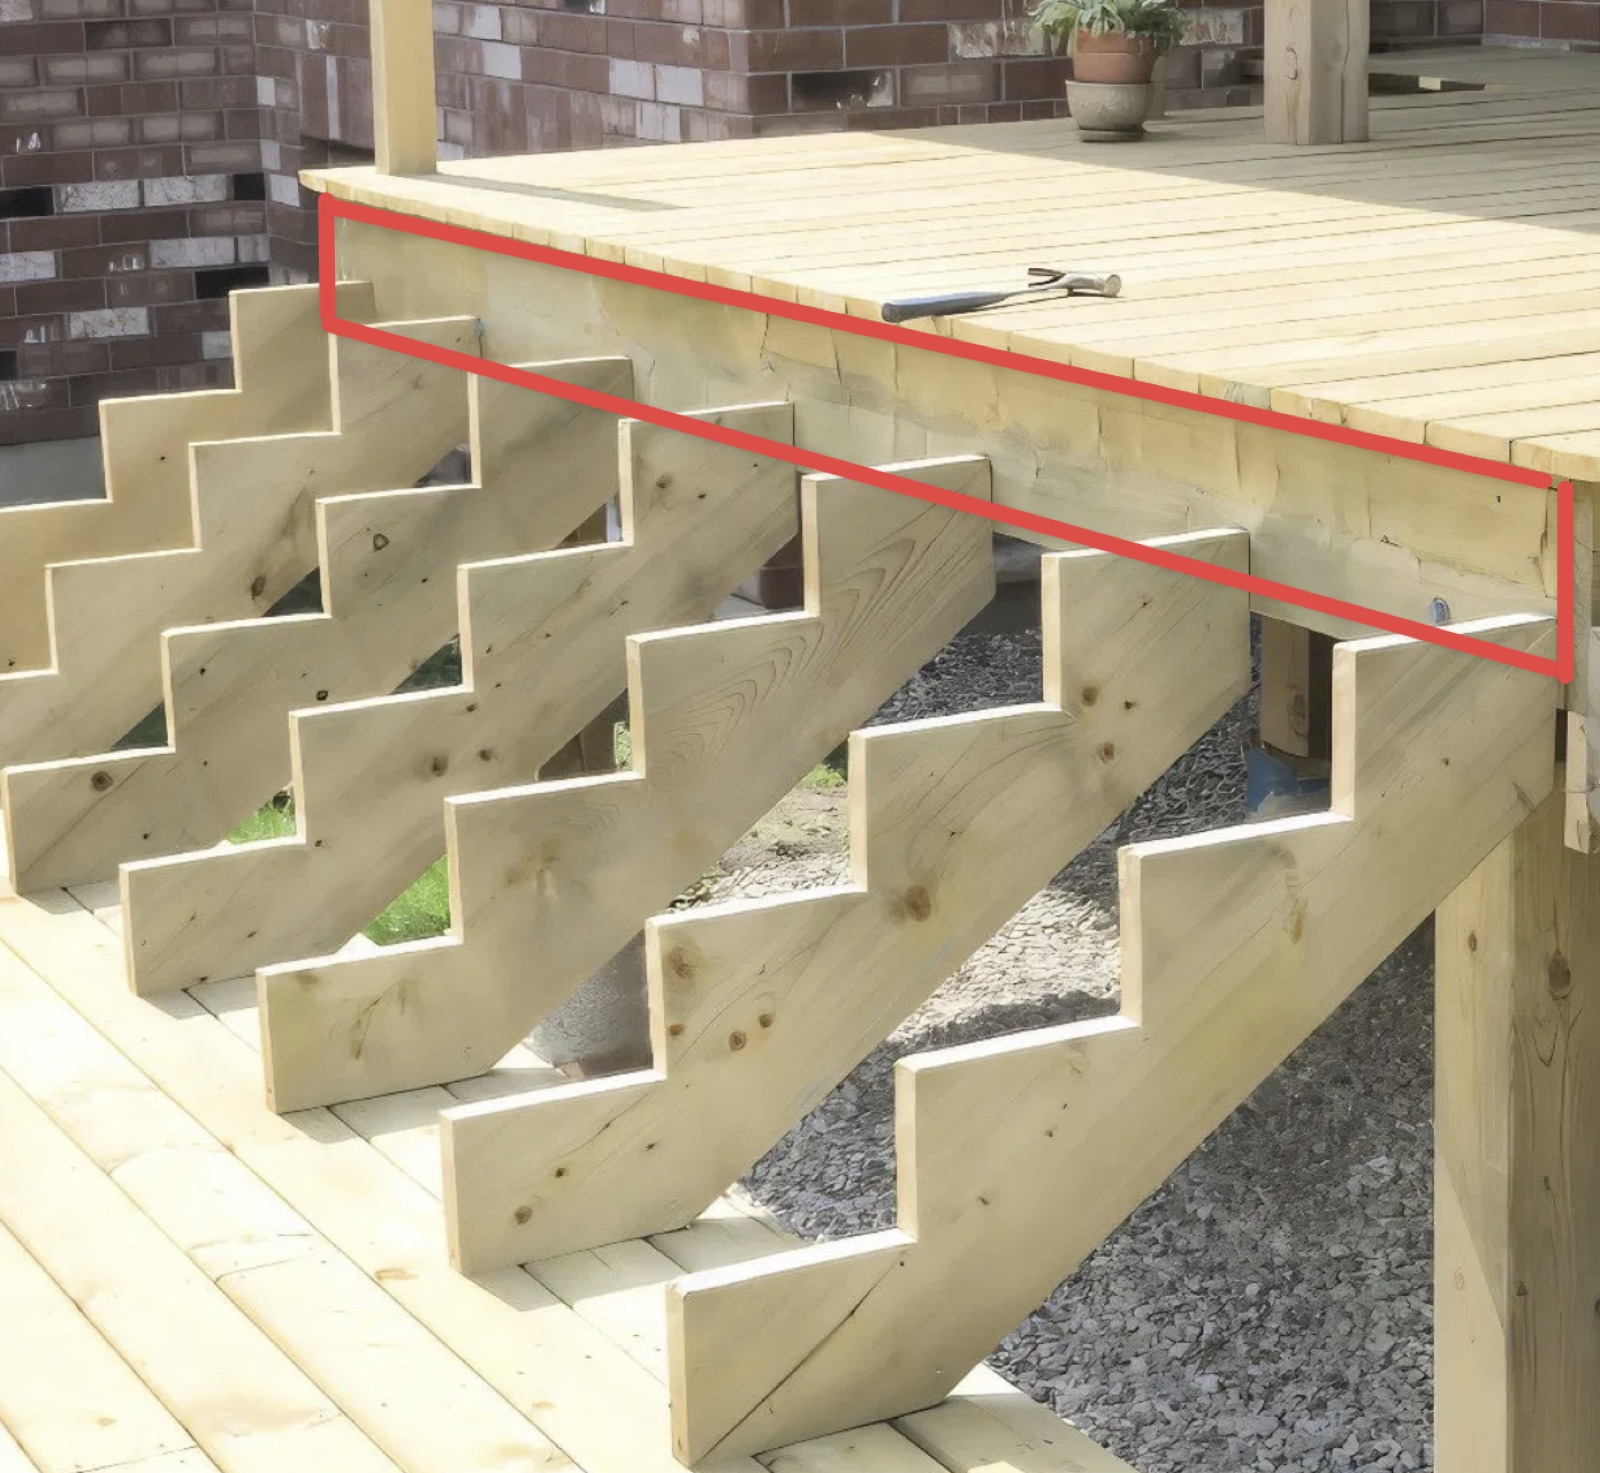 A ledger board outlined in red, with seven stringers attached.
This is the standard way most steps are built. There’s an important detail about the ledger board though: it’s a load bearing board and it supports the entire staircase. So whatever it’s anchored to needs to be rated to support the steps. My house has a brick facade around a wooden frame underneath which means the brick isn’t technically rated to be load bearing. So in the case of the stringer approach, I would have needed to drill through the brick and then attach the ledger into wooden joyces on the house frame underneath it. This seemed plenty doable but probably not worth the effort/risk.I opted for the stacked platform approach instead. That way I would literally just have to build some boxes, stack them on top of each other, and screw them together. The stacked platform approach would also let me build around my furnace exhaust pipes in a much easier way. That’s a lot less moving parts and room for error.
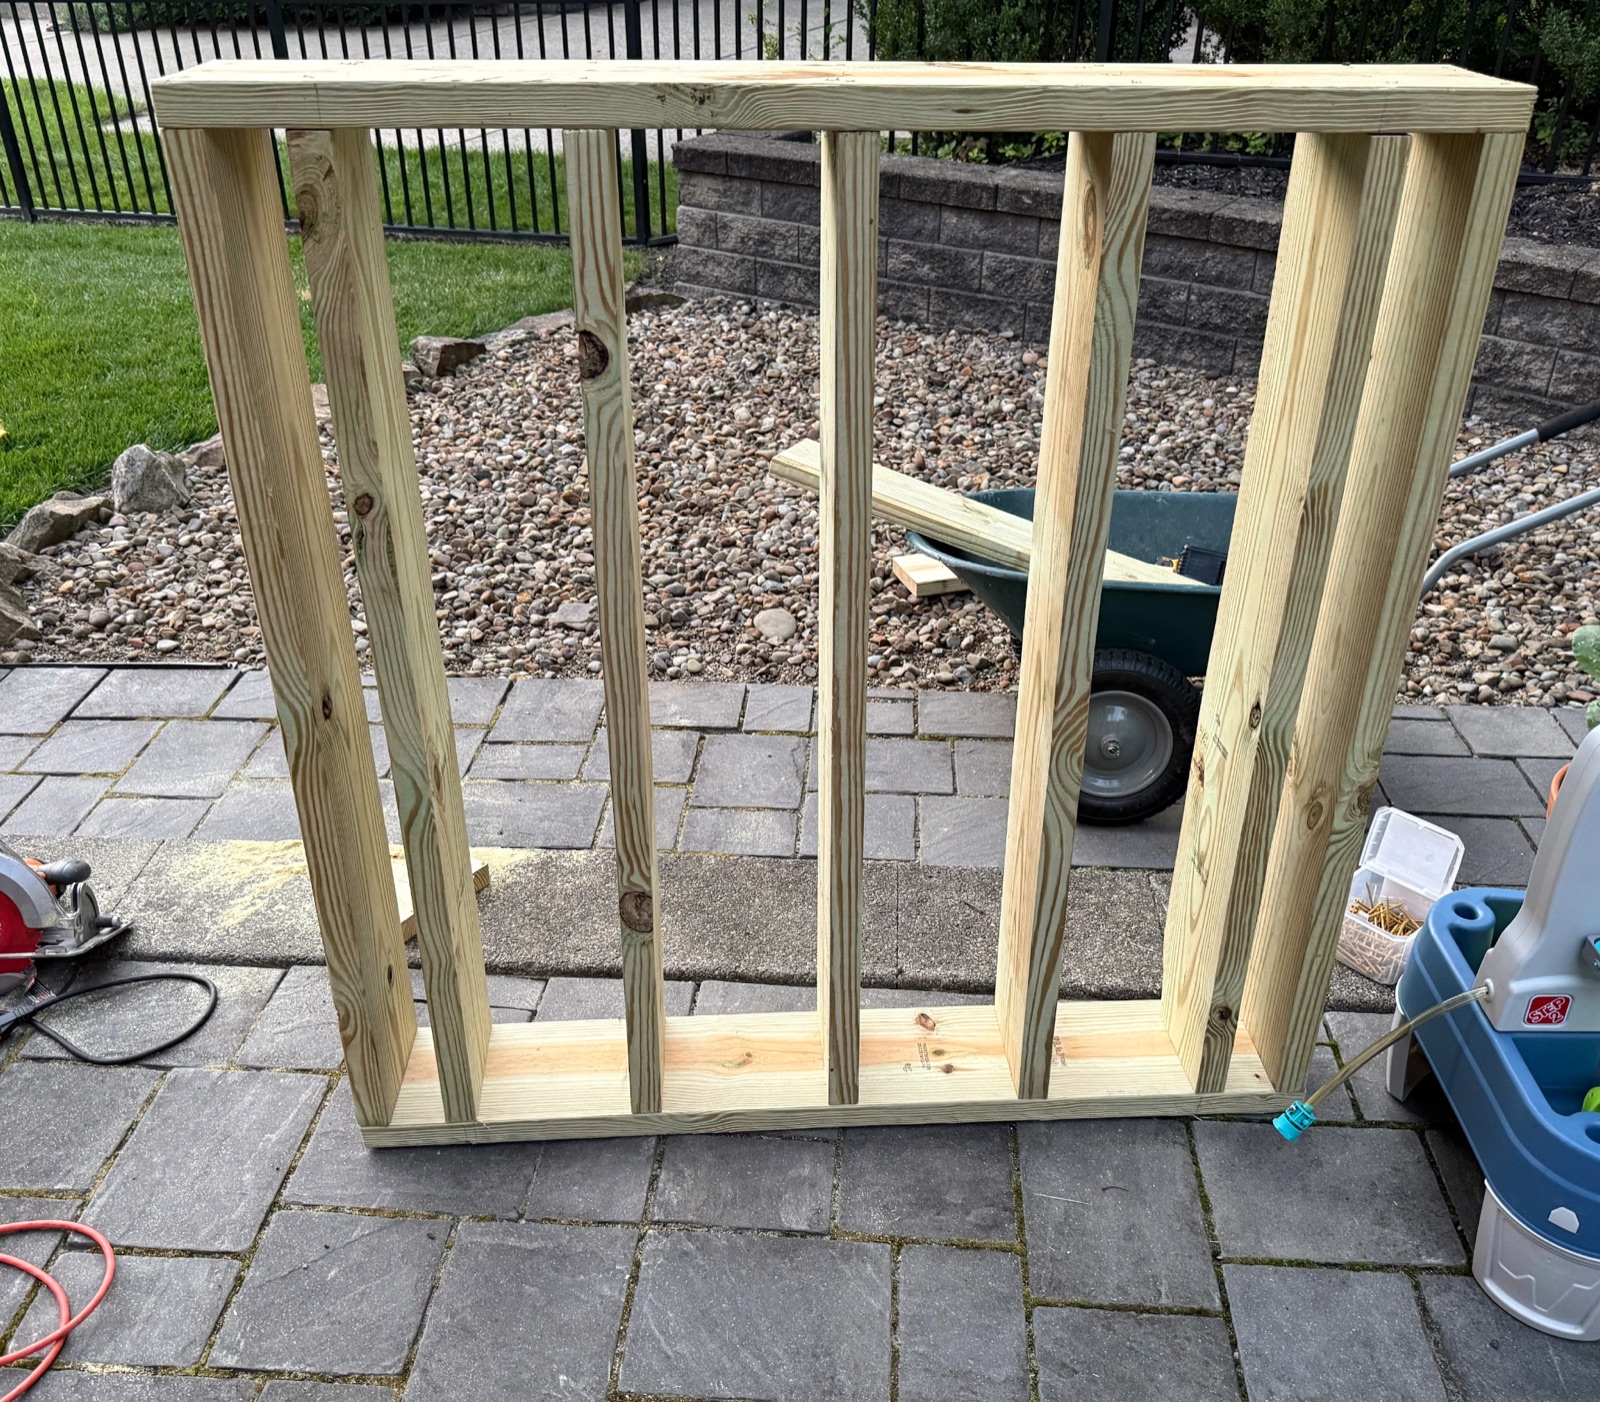
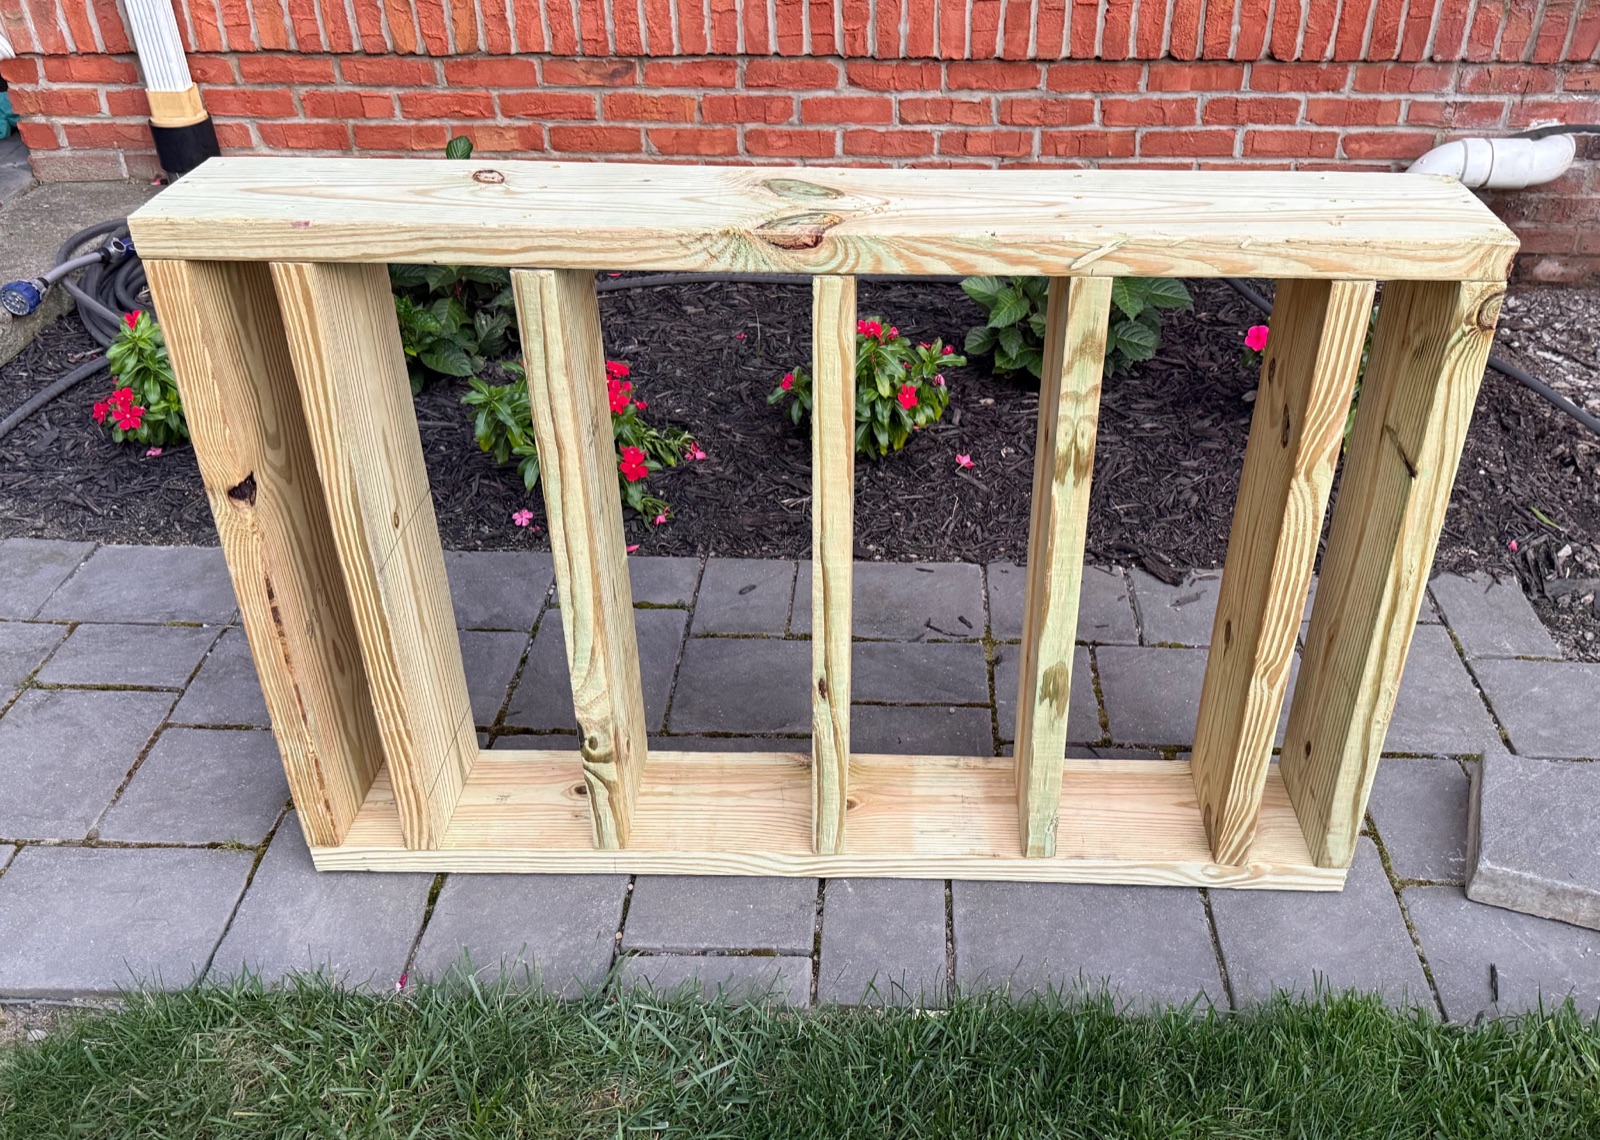
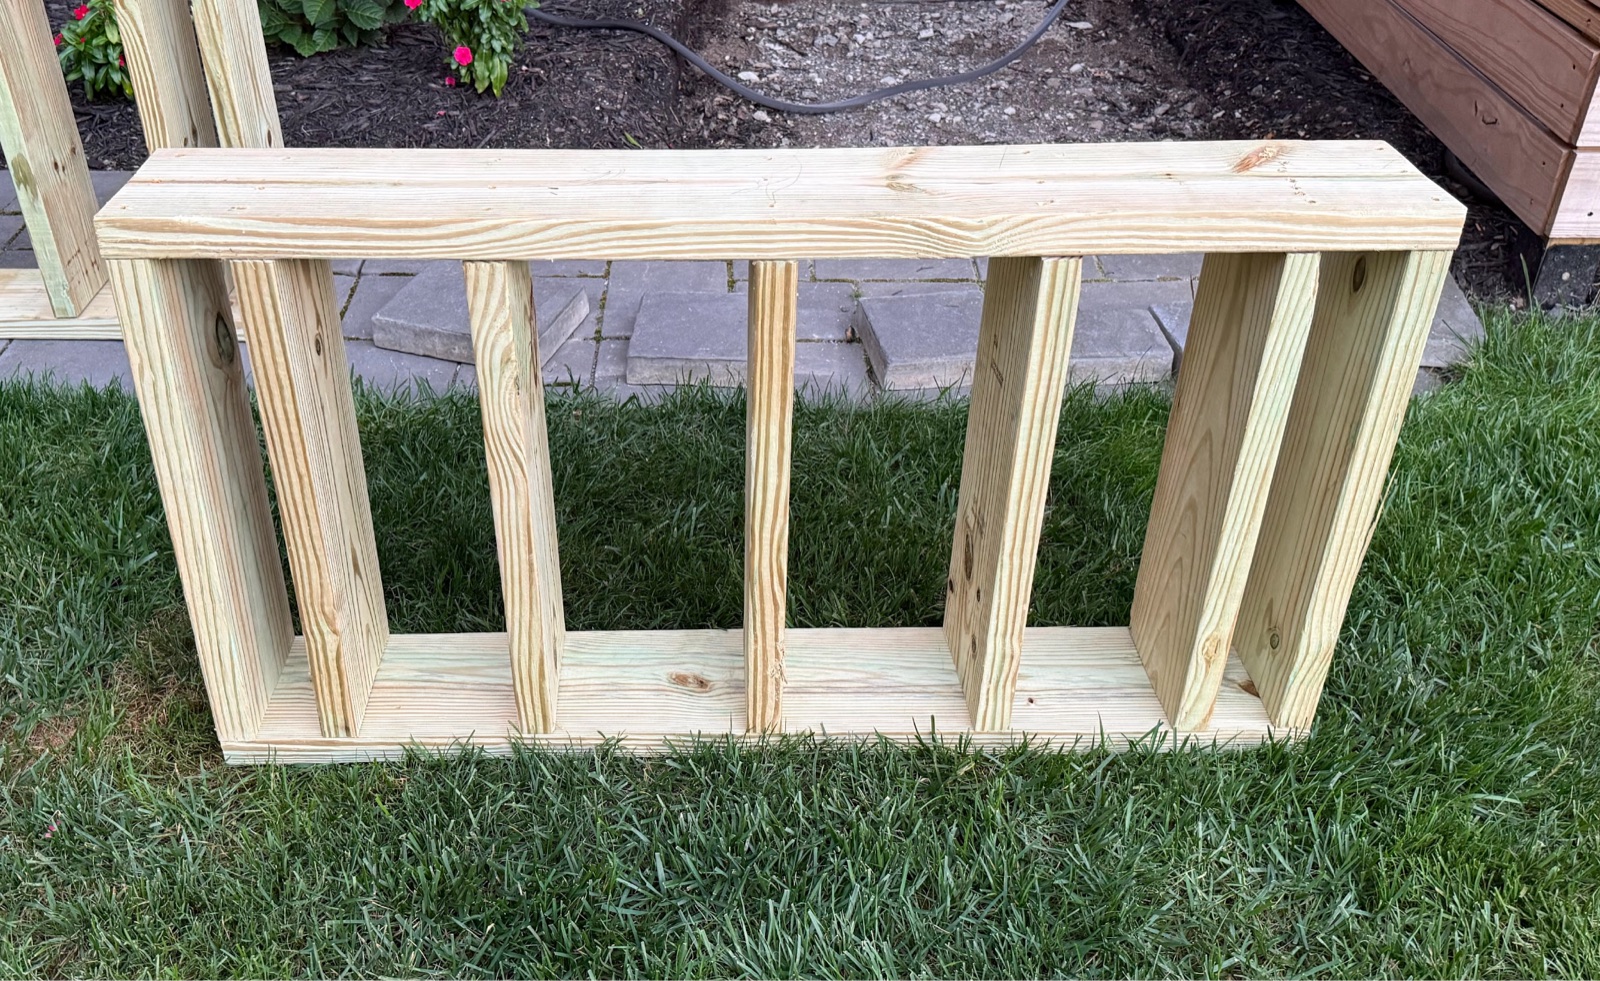
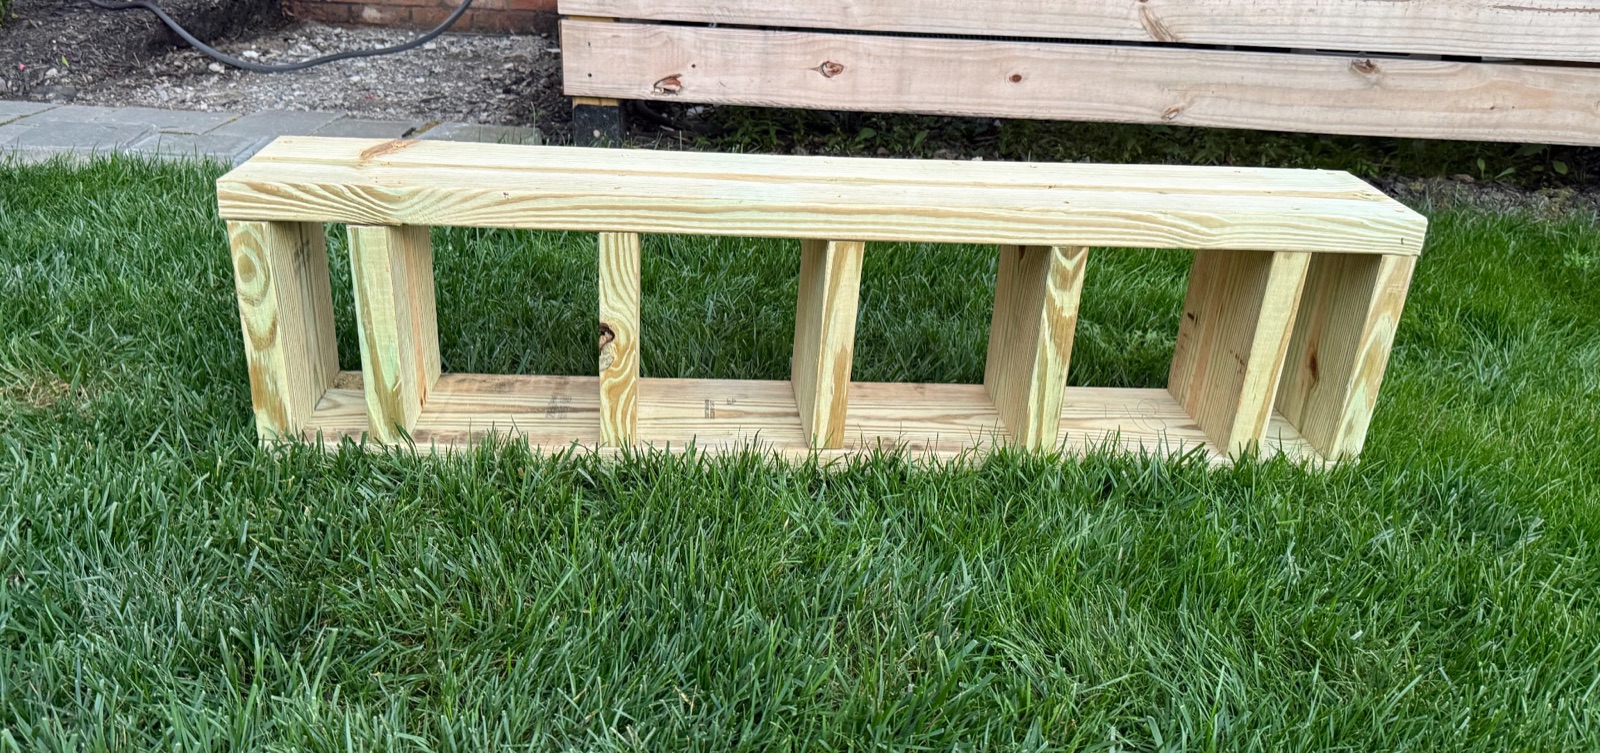
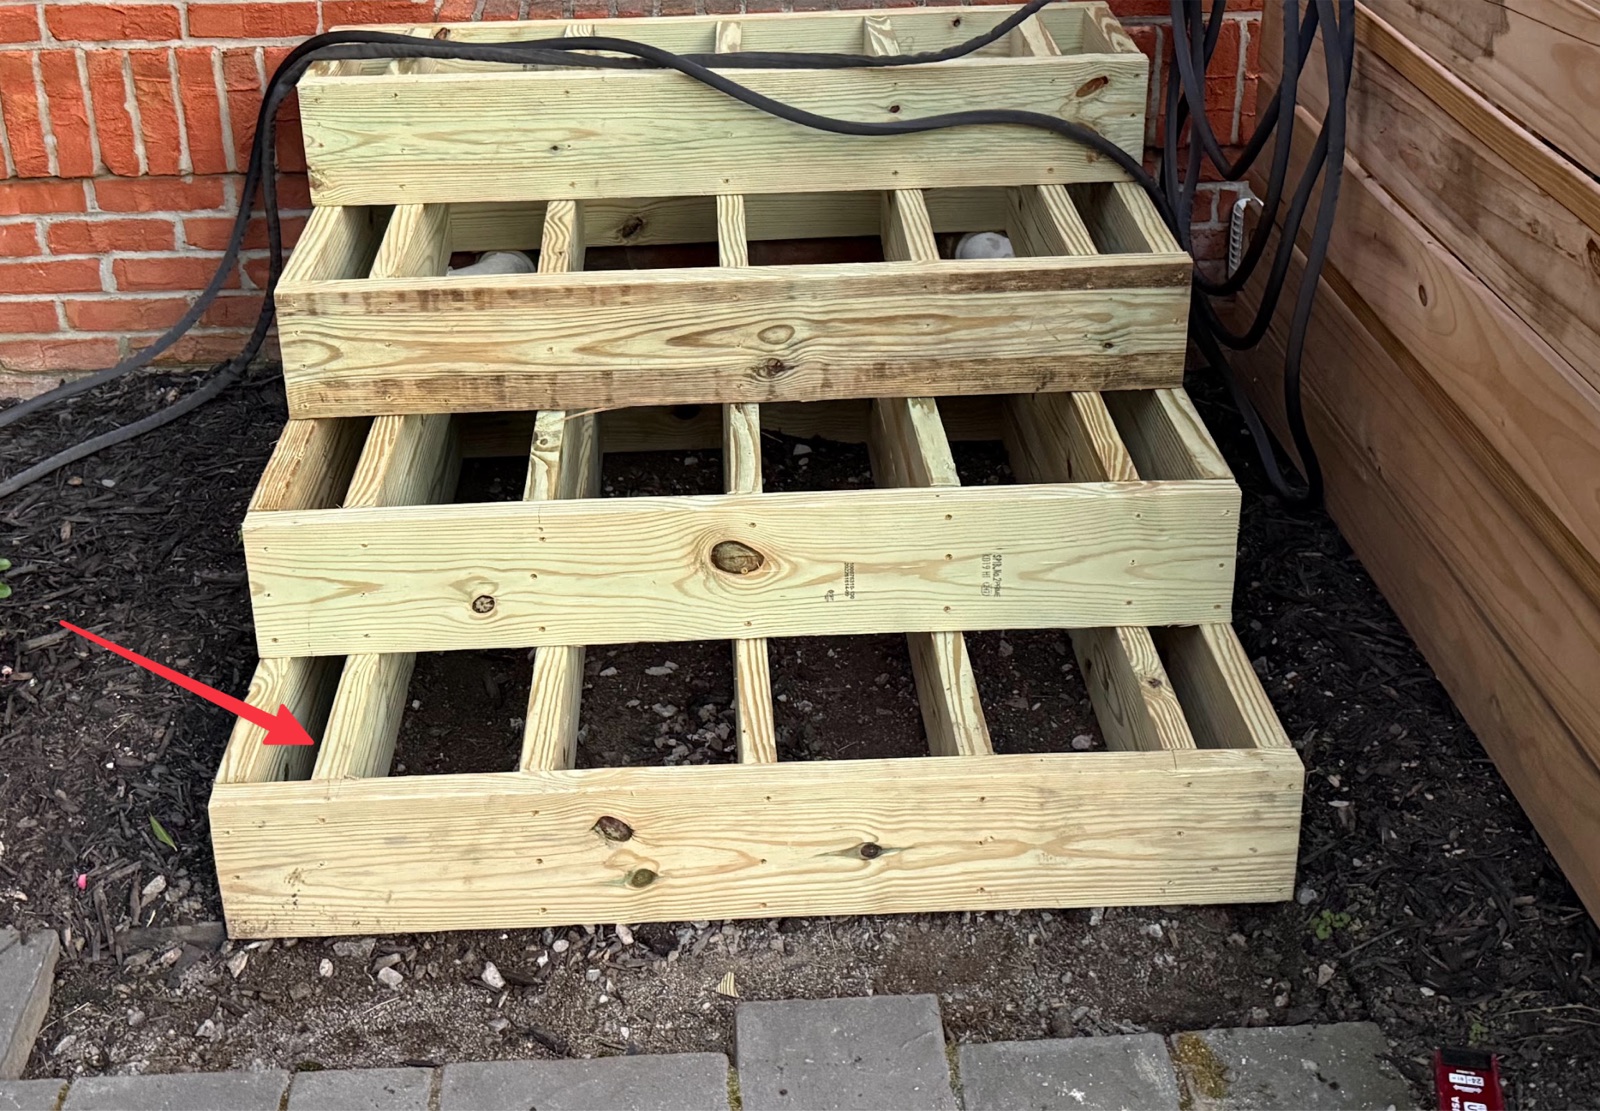 Each step needed a support board close enough to the outside edge to support the mitered decking board.
I decided that I didn’t want to have an exposed decking edge visible on the sides after cutting the boards to fit the width, and instead I would miter the outside board at a 45 degree angle to give everything a nicer, framed look. This required putting a support board closer to the outer edge of each step frame so the mitered decking boards would have something that they could be screwed into.
I ended up choosing a dark gray colored composite decking board from Trex which was 1x6 (actually .82x5.5 inches). I also used a matching fascia board that was 1x8 (actually .56x7.25 inches) to cover the risers (the vertical board that you can kick with your toes while going up steps) and the sides of the staircase. The fascia boards were conveniently sized to match the size of the boards I used to build the frame. Before assembling the steps, I stained the top edges of the support boards and parts of the risers on each frame dark gray so that any spacing between the gray decking boards wouldn’t show the light colored pine wood underneath.
To assemble, I began by setting the first and biggest step on a packed and leveled gravel surface. Then I put the second frame on top, measured out the depth of the step which could be at max 11.25 inches deep. The 11.25 number comes from two decking boards at 5.5 inches wide each (11 inches) + a .125 inch space between the decking boards + a .125 inch space between the decking board and the fascia of the next step. Then I attached the second step to the first step using three inch screws and started cutting my decking boards to fit.
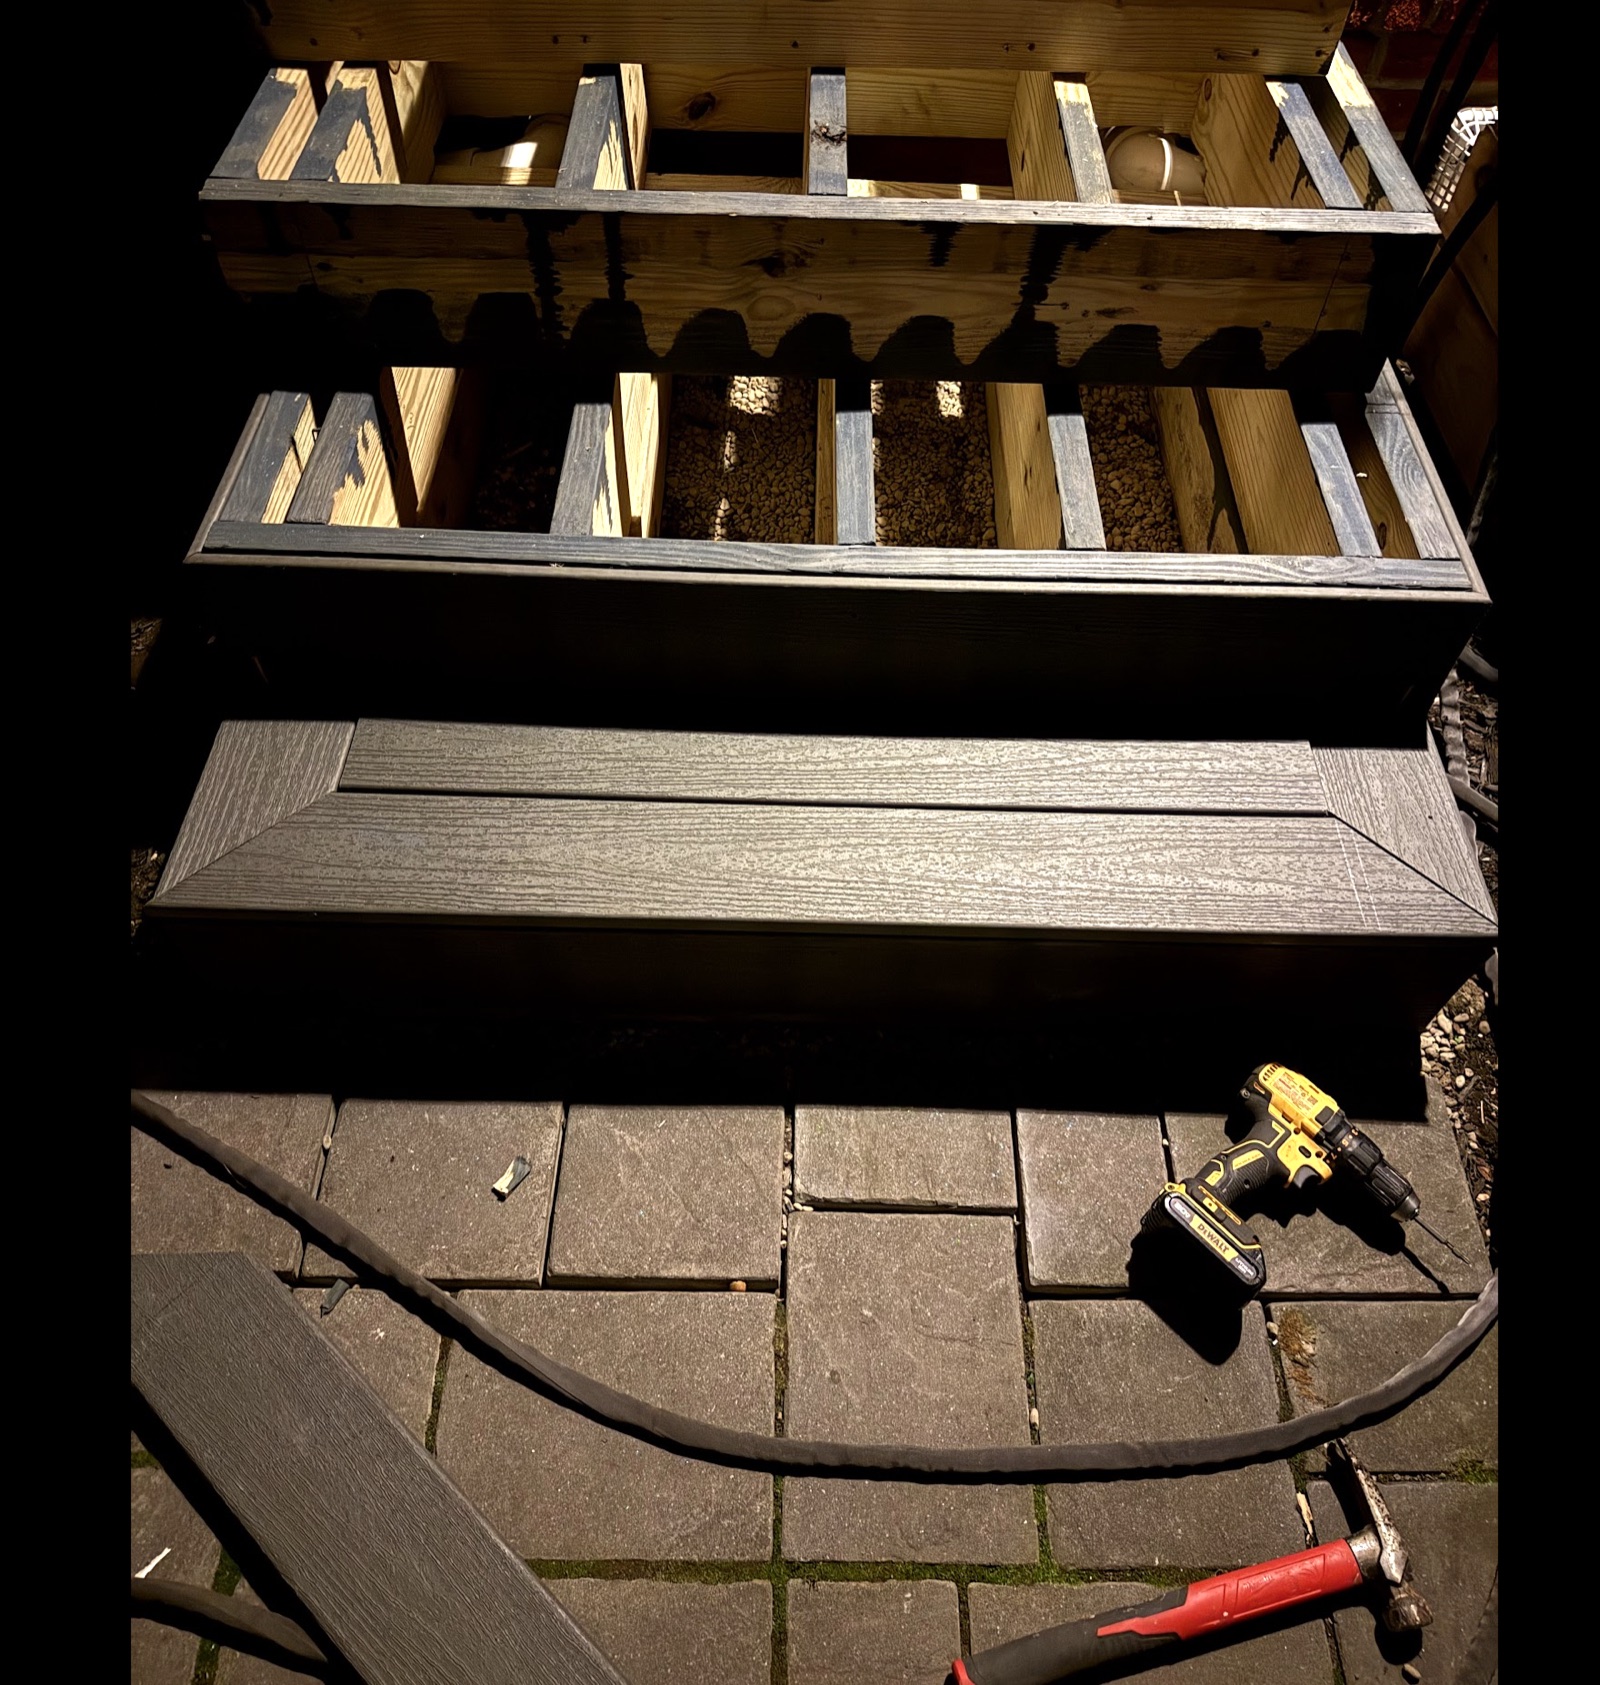 Mitered edges at 45 degrees hide an exposed decking board edge. Makes for a much cleaner look.
After I had my boards cut, I drilled some pilot holes, and attached the deck boards to the first step. This was relatively straightforward, but I learned that attaching the next step before attaching the current step’s runner boards was not the most ideal order of operations. Doing it this way made it error prone to set a consistent depth and properly align the step. So for the remaining steps, I attached the runners first, then used that as the mechanism to set the placement of the next step. Each step was built from the bottom up. This made assembly way faster and left a lot less room for error since the runner boards are exactly the same width and they’re manufactured perfectly straight. I repeated this process all the way up until I got to the top step.
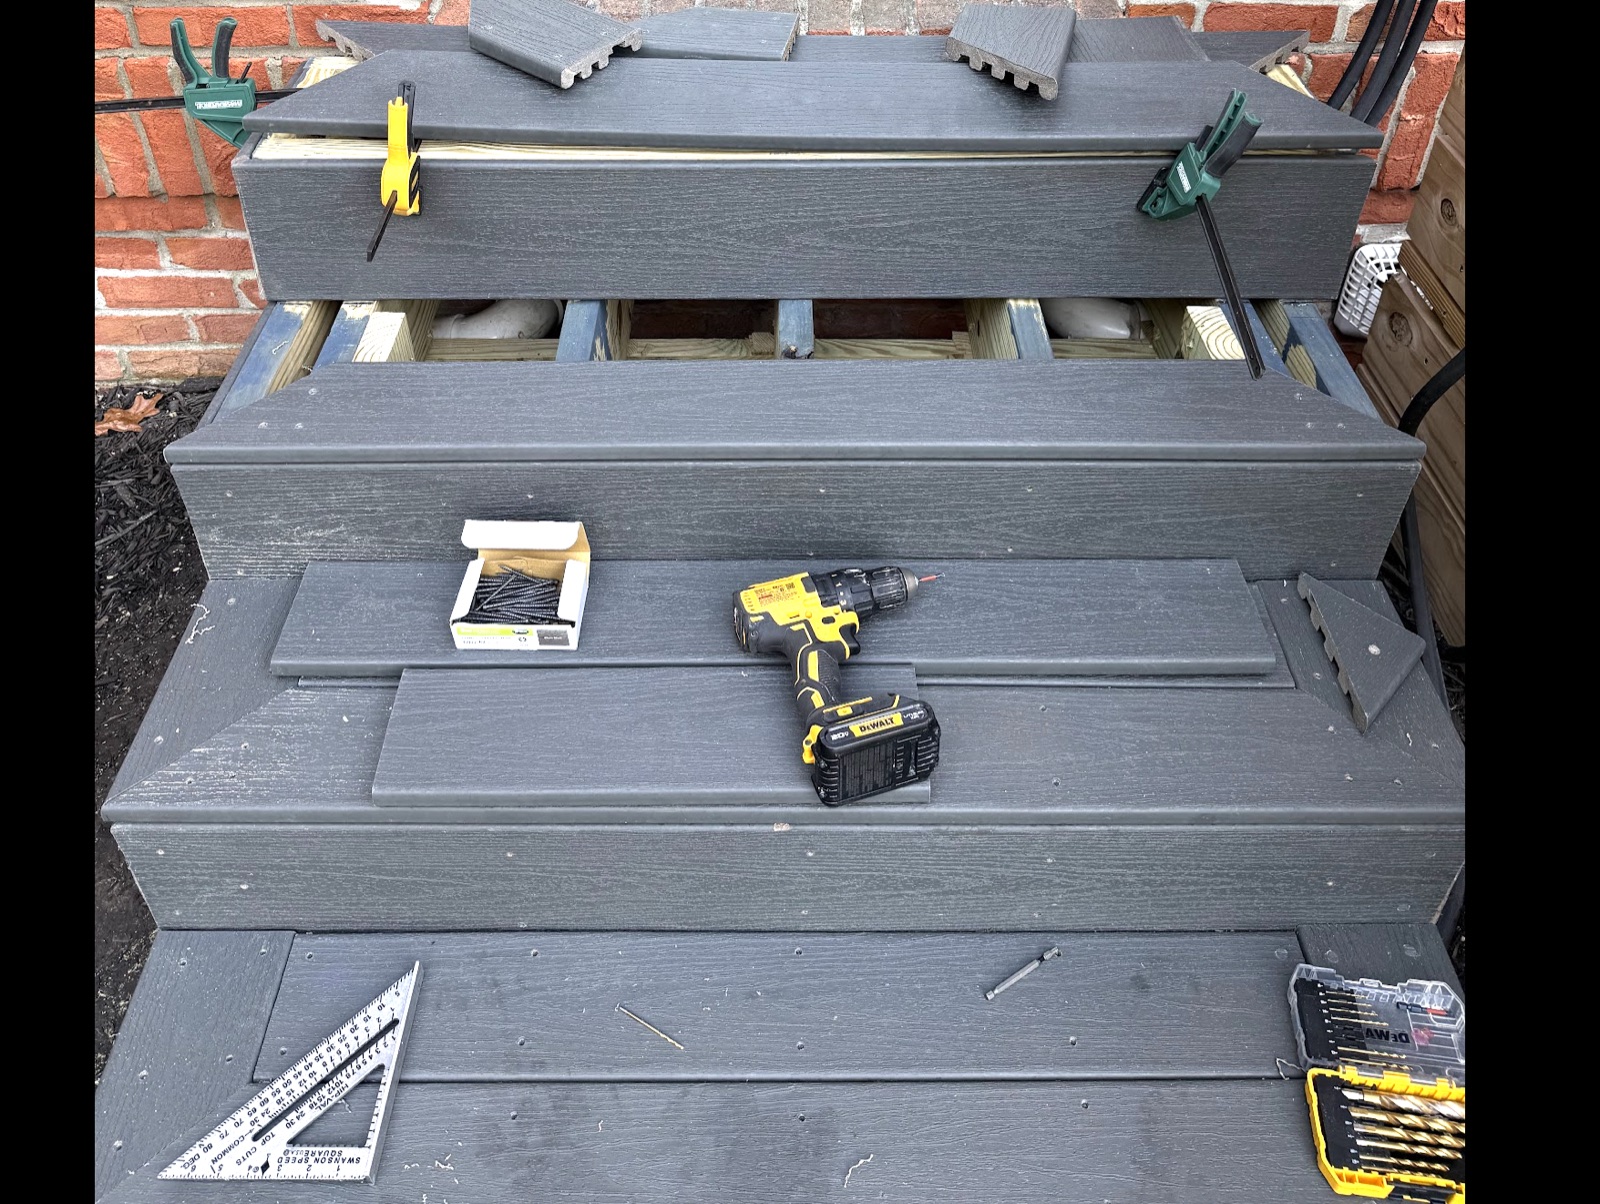
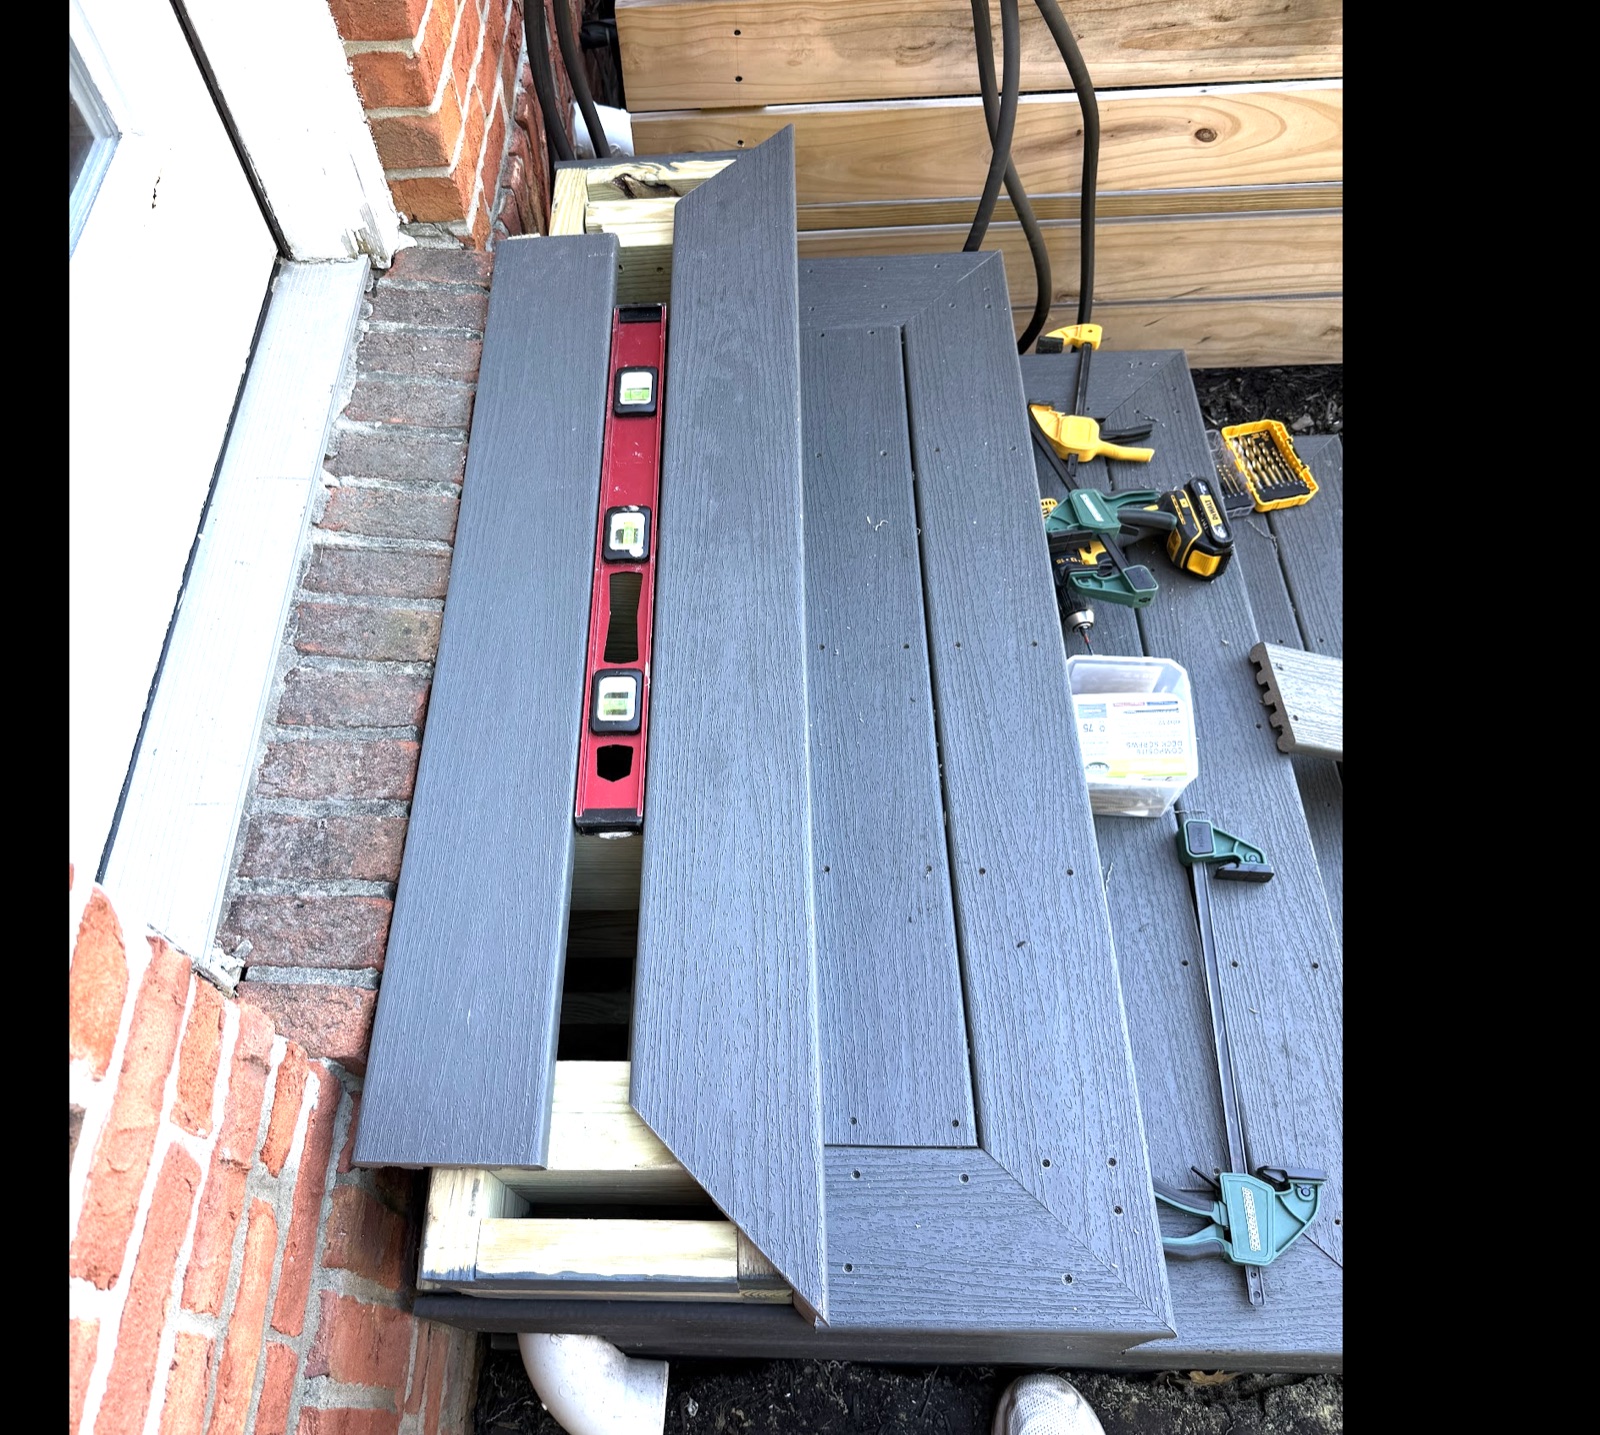
On the top step, I ran into another problem. The gap between the step and the brick threshold on my house was about two inches, which felt too big for comfort. When I noticed this I was confused because I had measured the depth (i.e. the total run) of the area the stairs needed to cover as 47 inches. Then I realized that I wrongly added the .56 inch fascia width when calculating the depth that each step would cover, which accounted for roughly 2 inches (.56 inches x 4 steps) of space over the entire depth of the staircase. This perfectly explained why my top step was two inches further from the brick threshold than it needed to be. The reason that adding the .56 fascia width is wrong is because it’s tucked under and sits flush the edge of the outside decking board on the next step up. So in effect, the fascia didn’t actually add any additional depth to the step. So the true depth of each step with spacing between boards is 11.25 inches, not 11.81 inches like my original calculations assumed. To solve this, I needed to add two inches back to the top step so it was nearly flush with the brick threshold. I decided that the best option here was to cut a two inch strip of decking board and put it between the two standard sized decking boards that each step got. This hack could have been completely avoided if I started the bottom step two inches further away from the patio, though I think a nearly four inch gap there at the bottom would have looked strange.
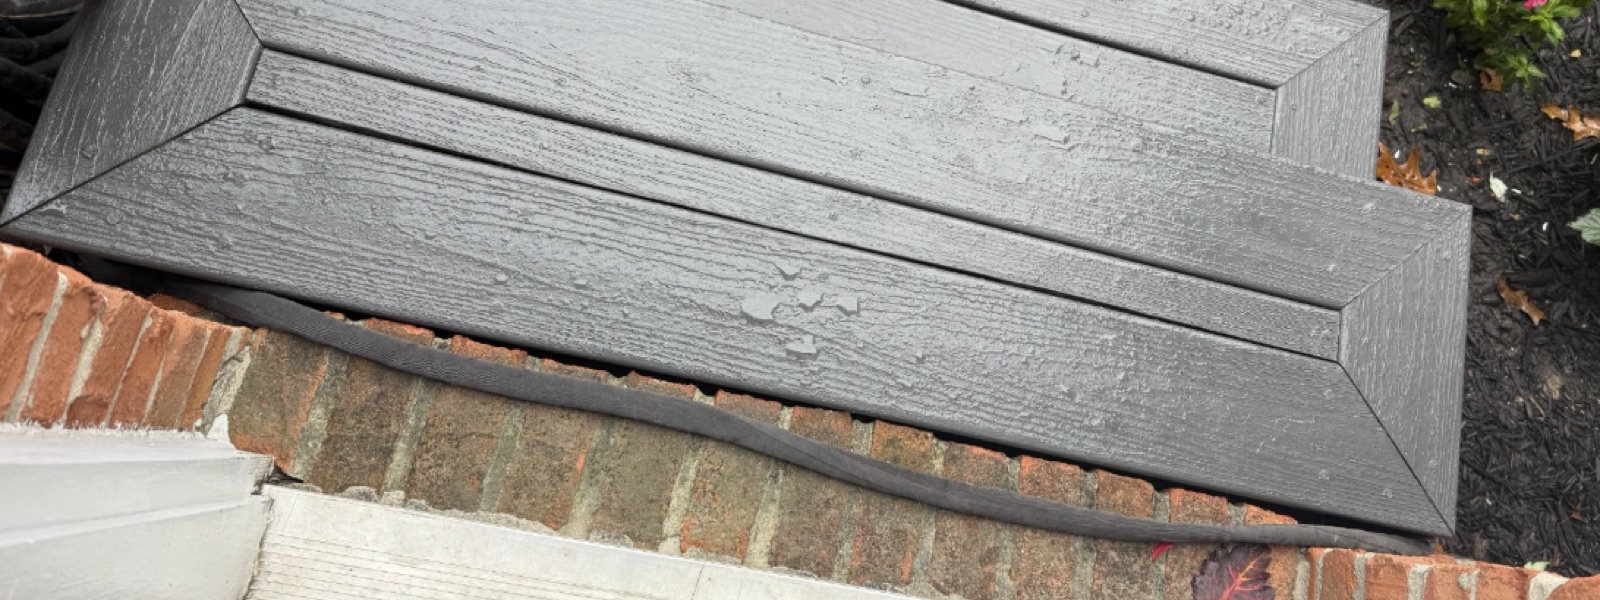 Two inch expansion board with mitered edges on both the front and back side of the step.
I actually really liked how this little expansion piece came together. The top step ended up being nearly flush with the brick threshold and it’s two inches wider which is a nice comfort feature for the top of a staircase.
After working out the changes to the top step, I was pretty much done and just had to screw the final pieces together, and then plug the screw holes so they weren’t as noticeable.
Here’s the final product.
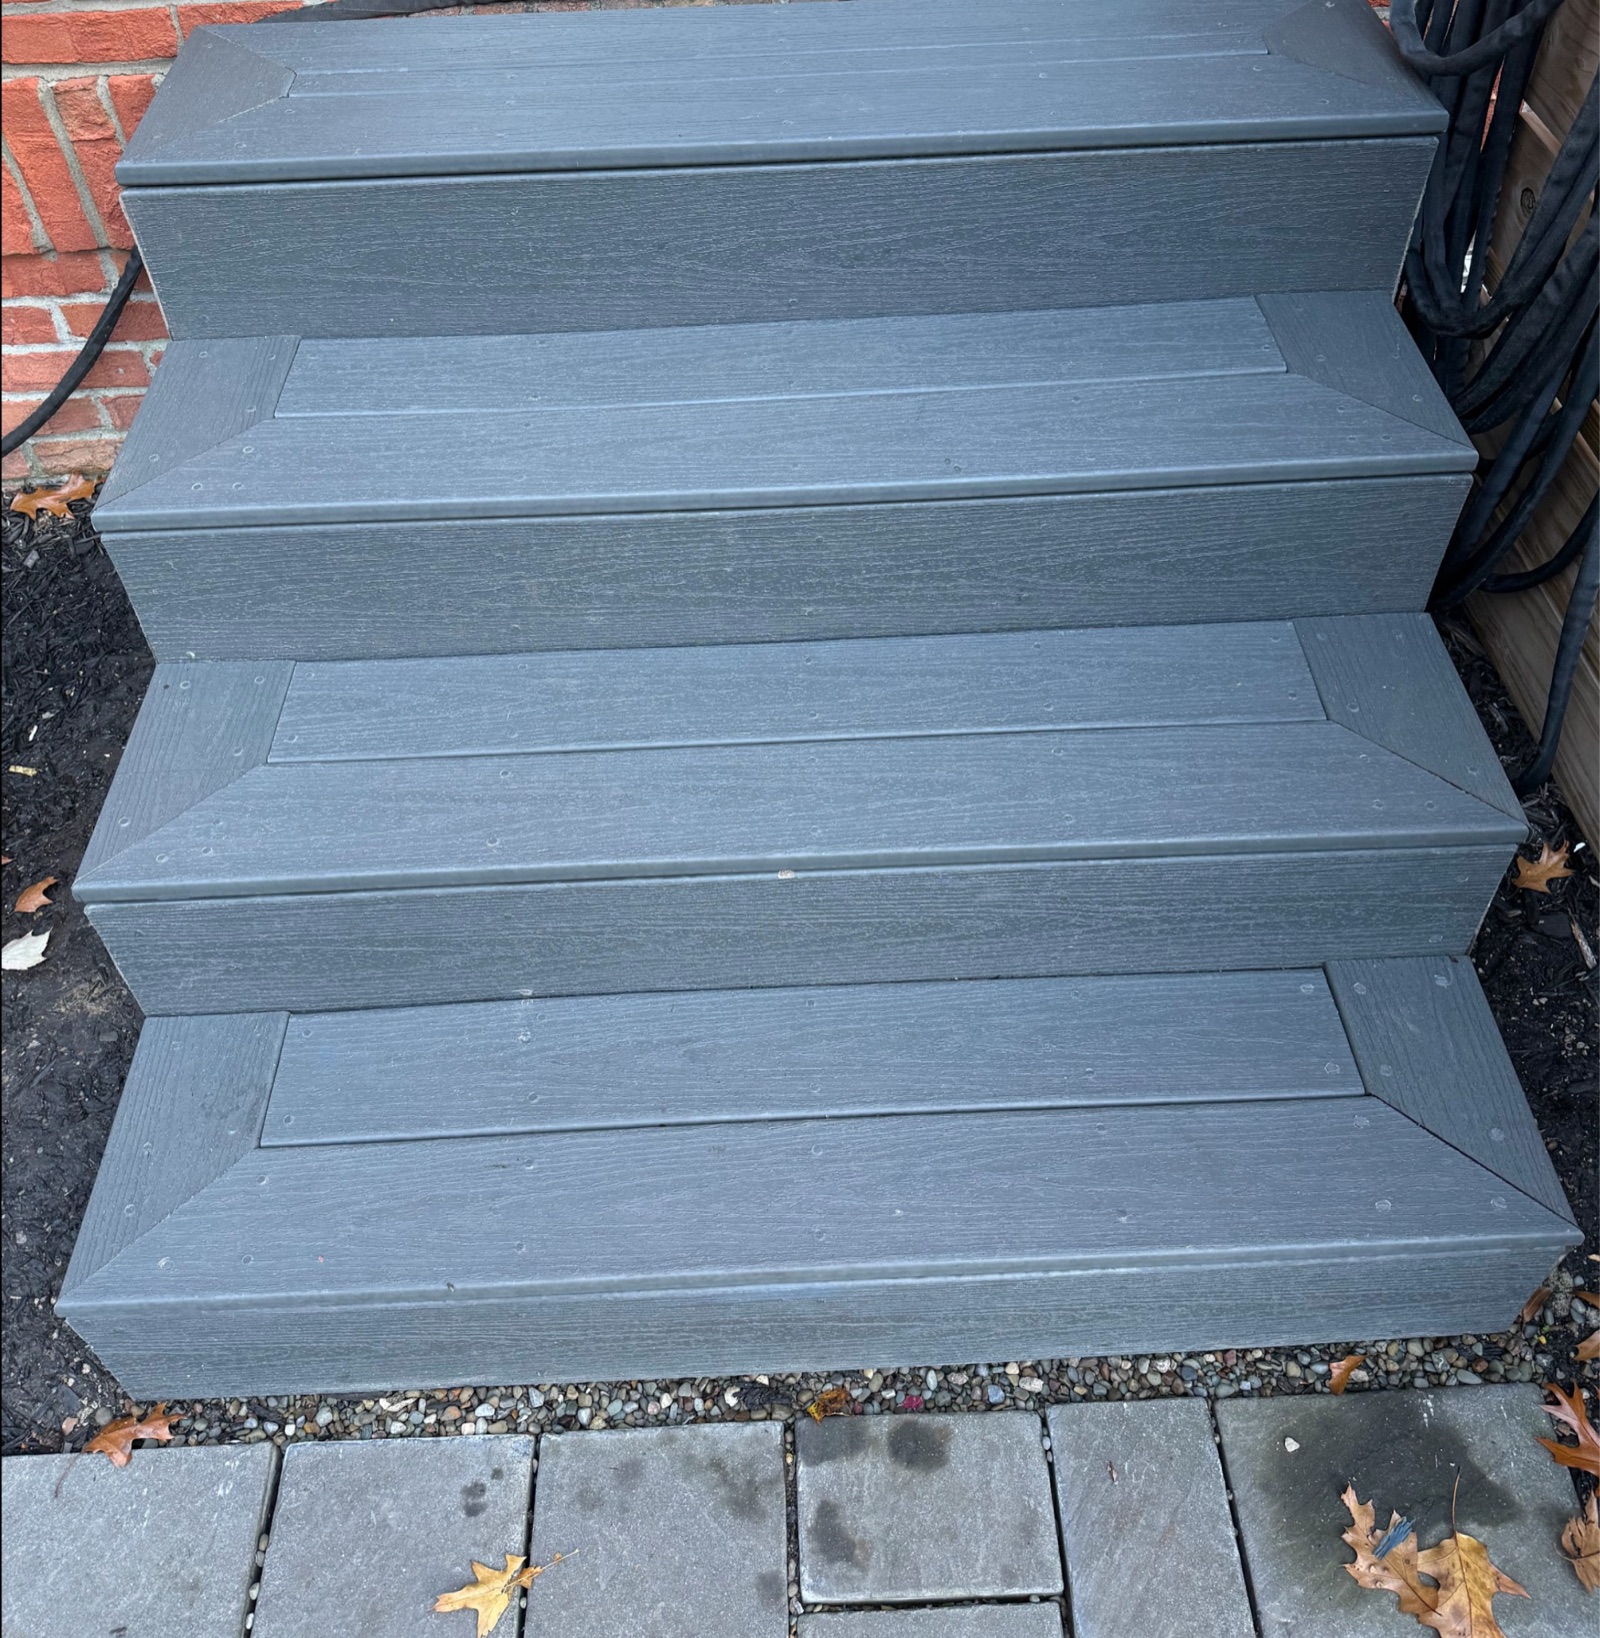
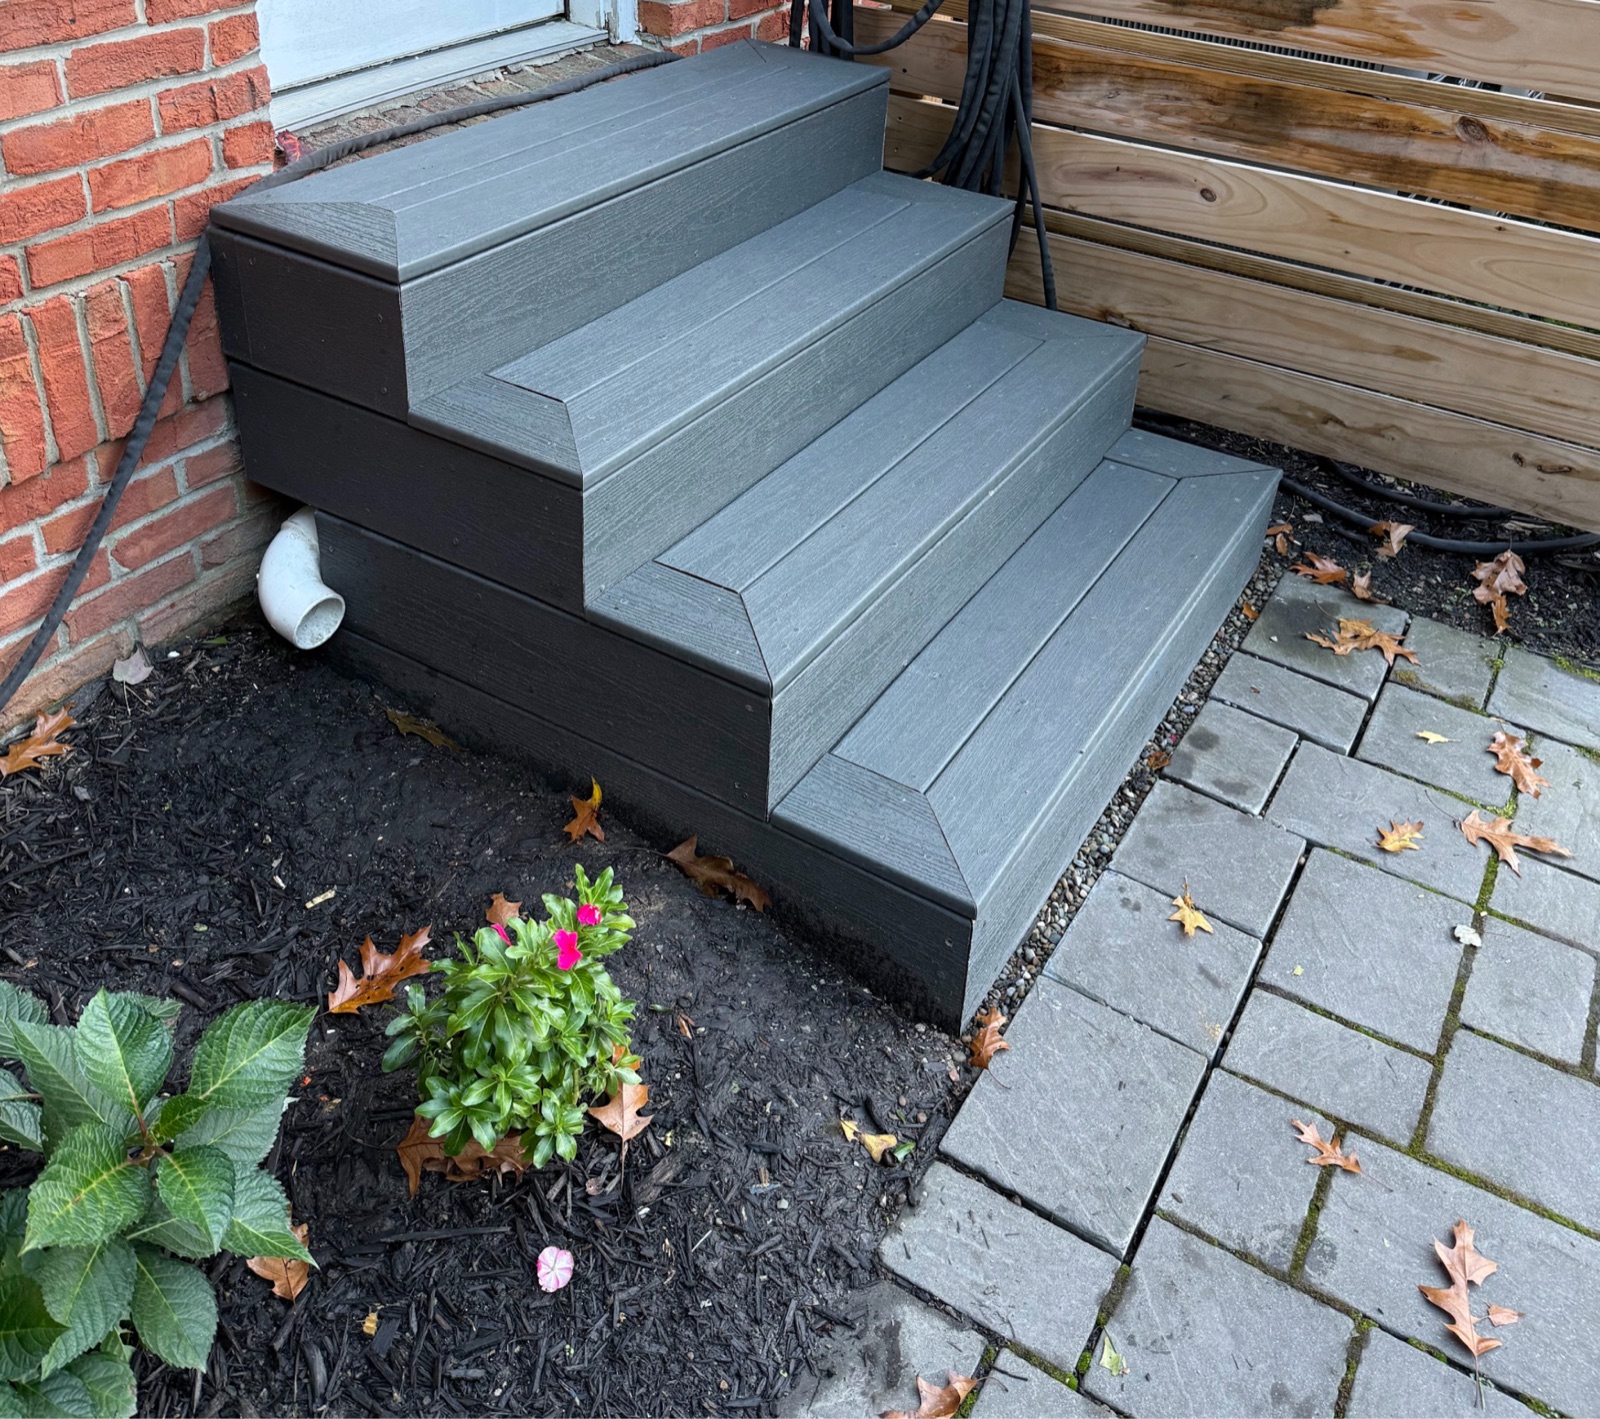
Overall, I think I’d give myself a B+ grade on this project. All in all it cost about $800 which doesn’t include my time. It turned out pretty good, but there were some mistakes I made like not properly accounting for the gap on the top step. And there was certainly room to be more precise across the entire project. With any type of project whether that’s digital or physical, there’s so many details and so many moments where you need to be able to look around the corner and know how your decision now will affect what you can (or can’t) do in future steps. The difference in physical projects is the cost of a mistake is so much steeper than that when you’re building something digital, and so that planning muscle really becomes an invaluable skill. I’m pretty handy and installed things like doors and wood floors in my house, but don’t feel like I totally have that planning muscle yet. I was impressed with my ability to improvise and find a solution that I was happy with, even though it wasn’t perfect. It was a pretty fun project and was a nice thing to tinker with for an hour here and there through the busyness of life with kids. I find it increasingly satisfying to build physical things with my hands in the age of AI, which I heavily use every day to code for my job. To close, here’s a list of my biggest learnings from this project.
- Don’t be married to a particular solution. So many times, I’ve started projects with a particular plan in mind only to change that multiple times as I start working. I think this flexibility in how I solve problems is one of my superpowers.
- Use high quality tools. Halfway through the project I bought a new miter saw because my old one didn’t have a blade wide enough to cut through each board which made it hard to precisely cut the boards. The new saw gave me way better accuracy and sped things up considerably.
- Stairs like this should be built from the bottom up. Attach the outer runner first, then the inner runner, then attach the next step. This let me use the runners as a depth guide.
- Measure properly. Make sure to correctly factor in whether certain pieces of material truly add (or don’t) to the true measurements of your project.
- Wear gloves. Handling boards, screws, and tools roughs up your hands.